This website uses affiliate links that earn commission on purchases at no extra cost to you. Thank you for using them and supporting my content!
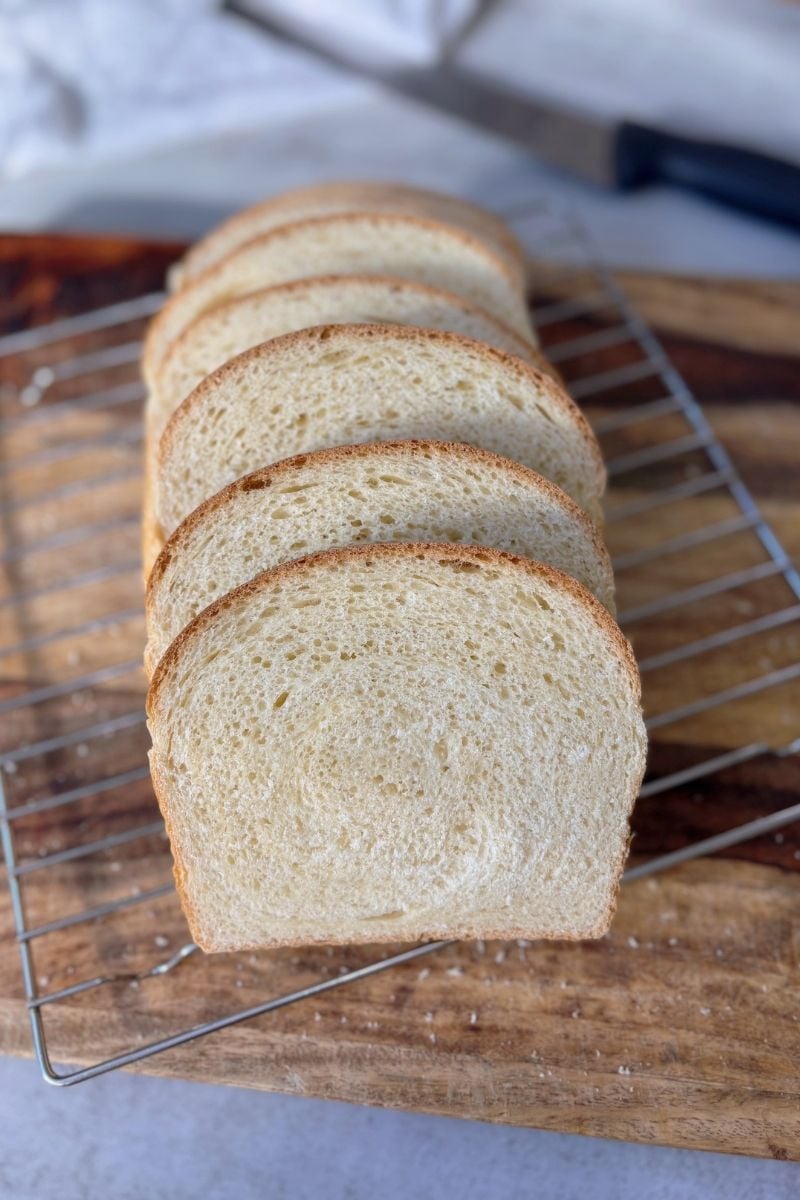
If you’ve been around here for a while, you probably know that my Soft Sourdough Sandwich Bread is hands-down the most popular recipe on my website. And honestly—it makes sense! It’s soft, fluffy, easy to slice, and perfect for everything from toast to grilled cheese.
But I couldn’t help thinking… what if we took that same soft, dreamy sourdough bread and added a savory, flavorful twist?
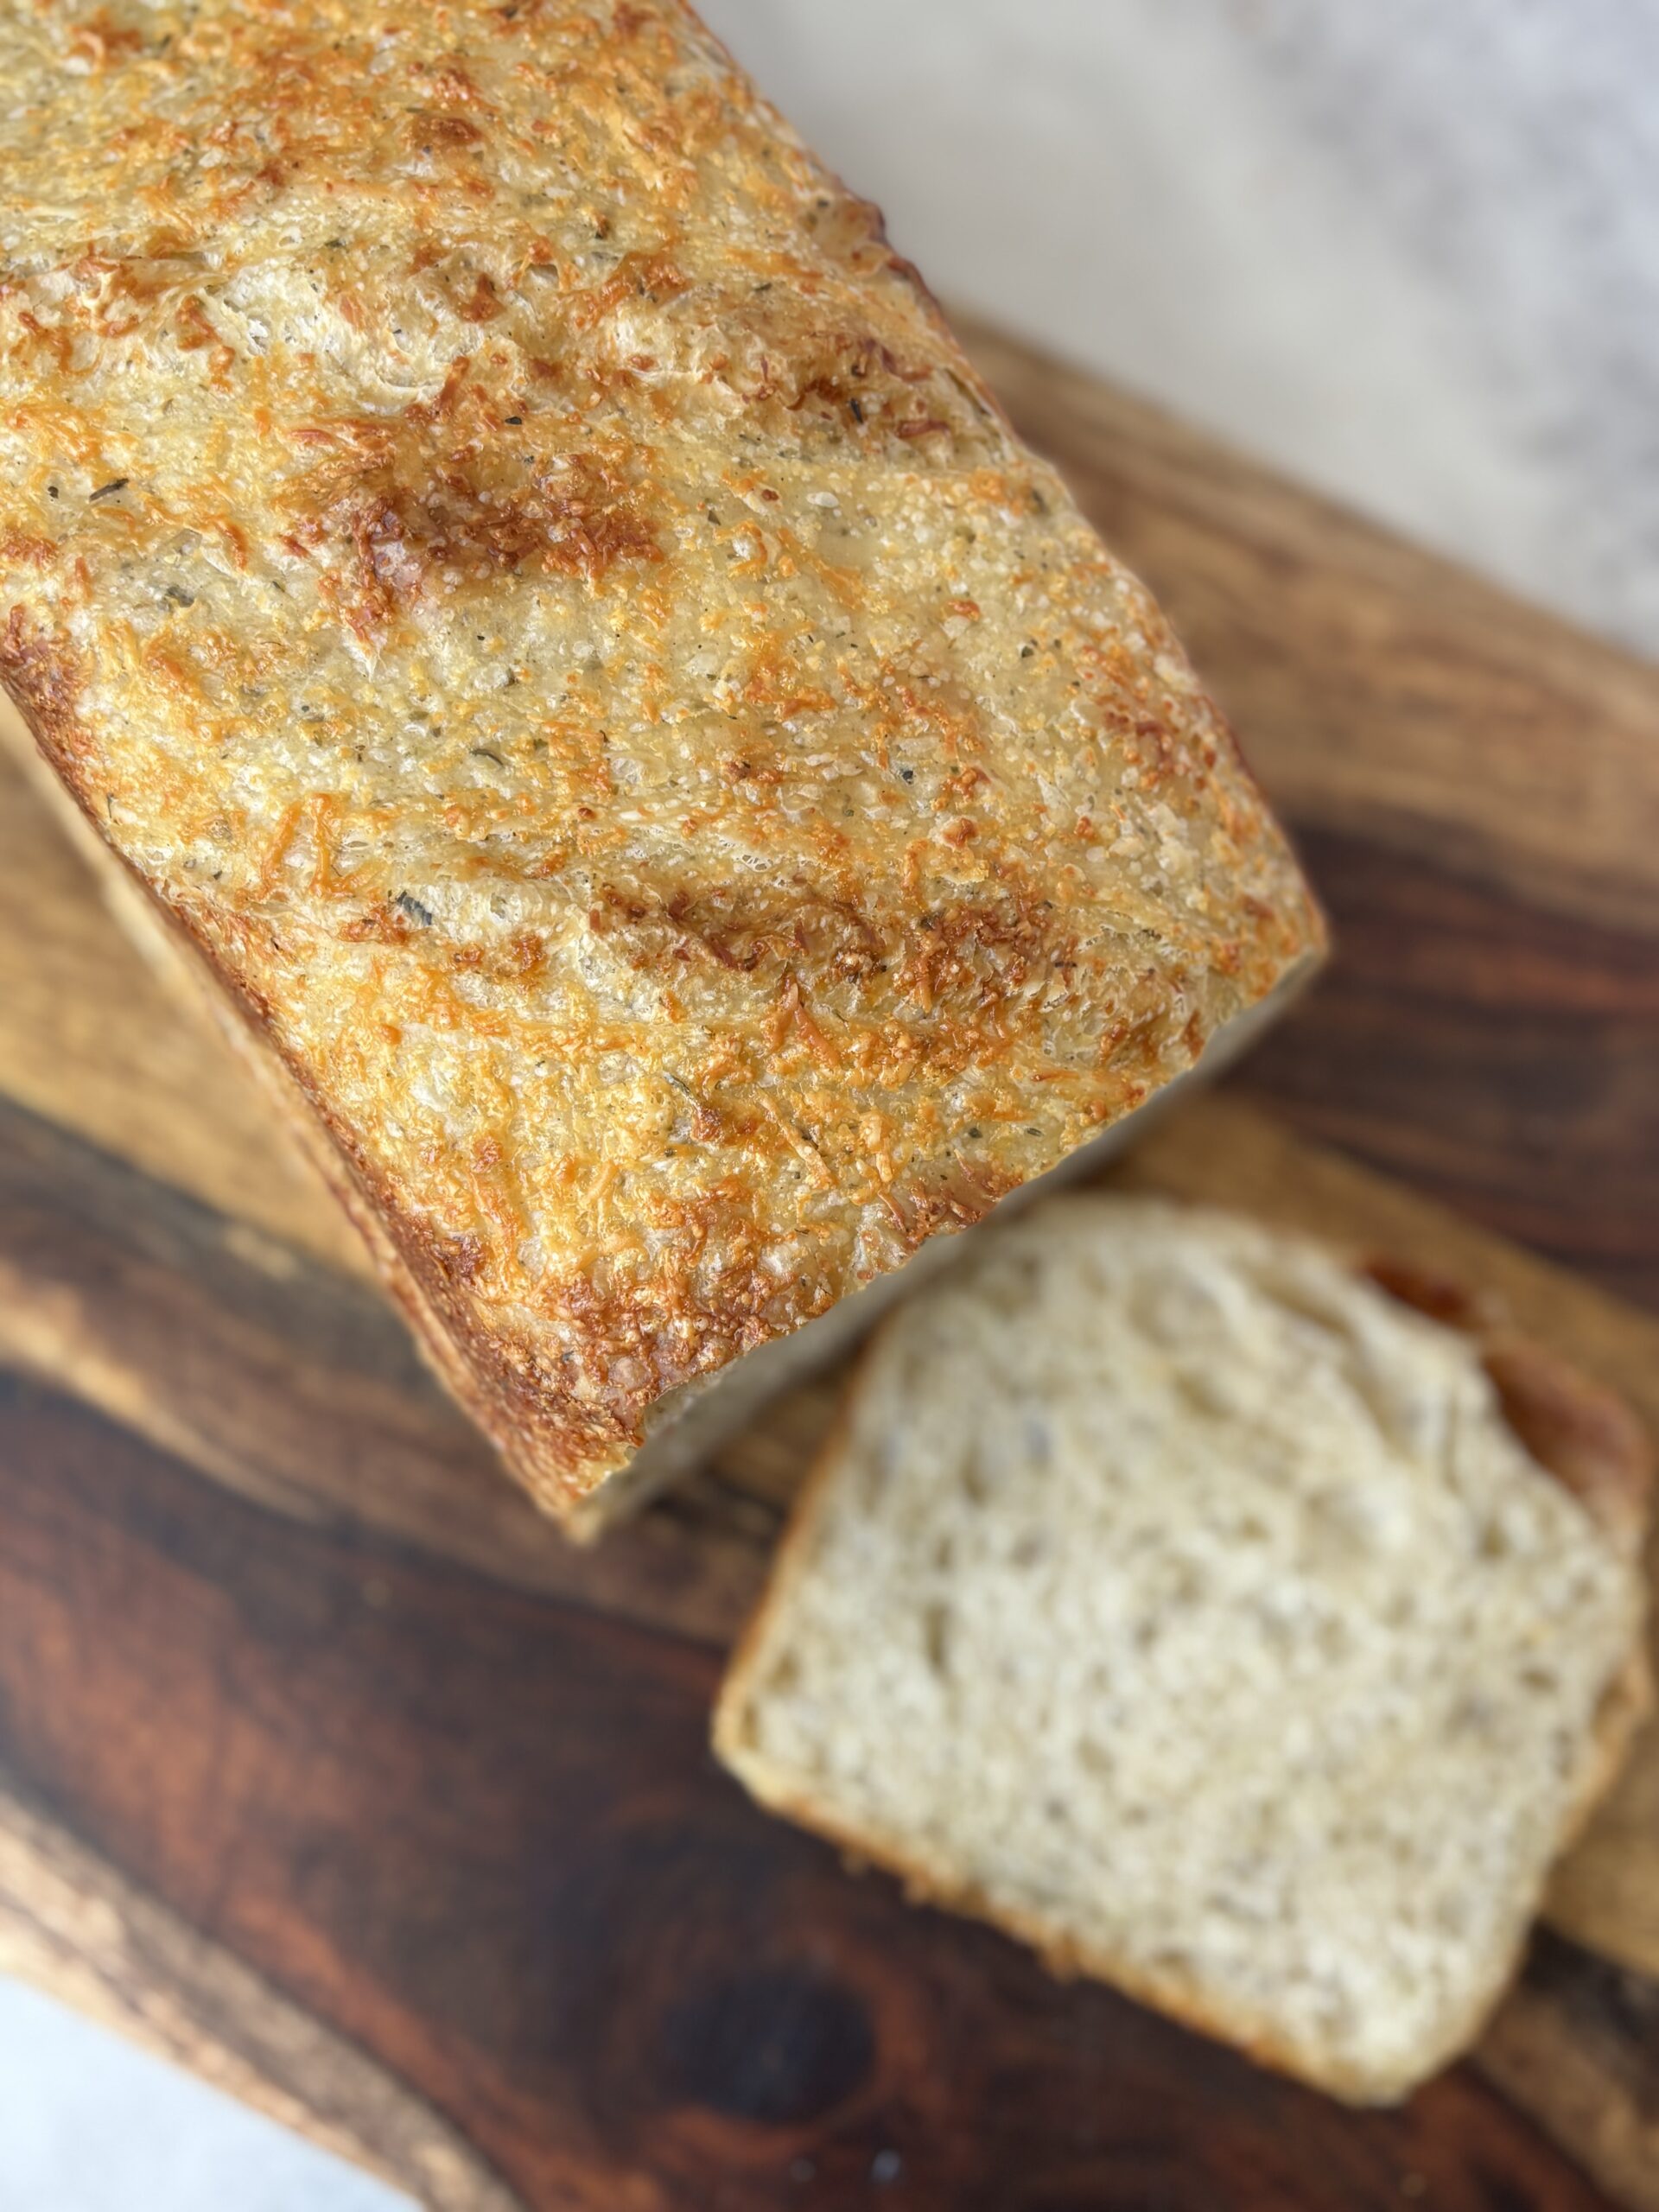
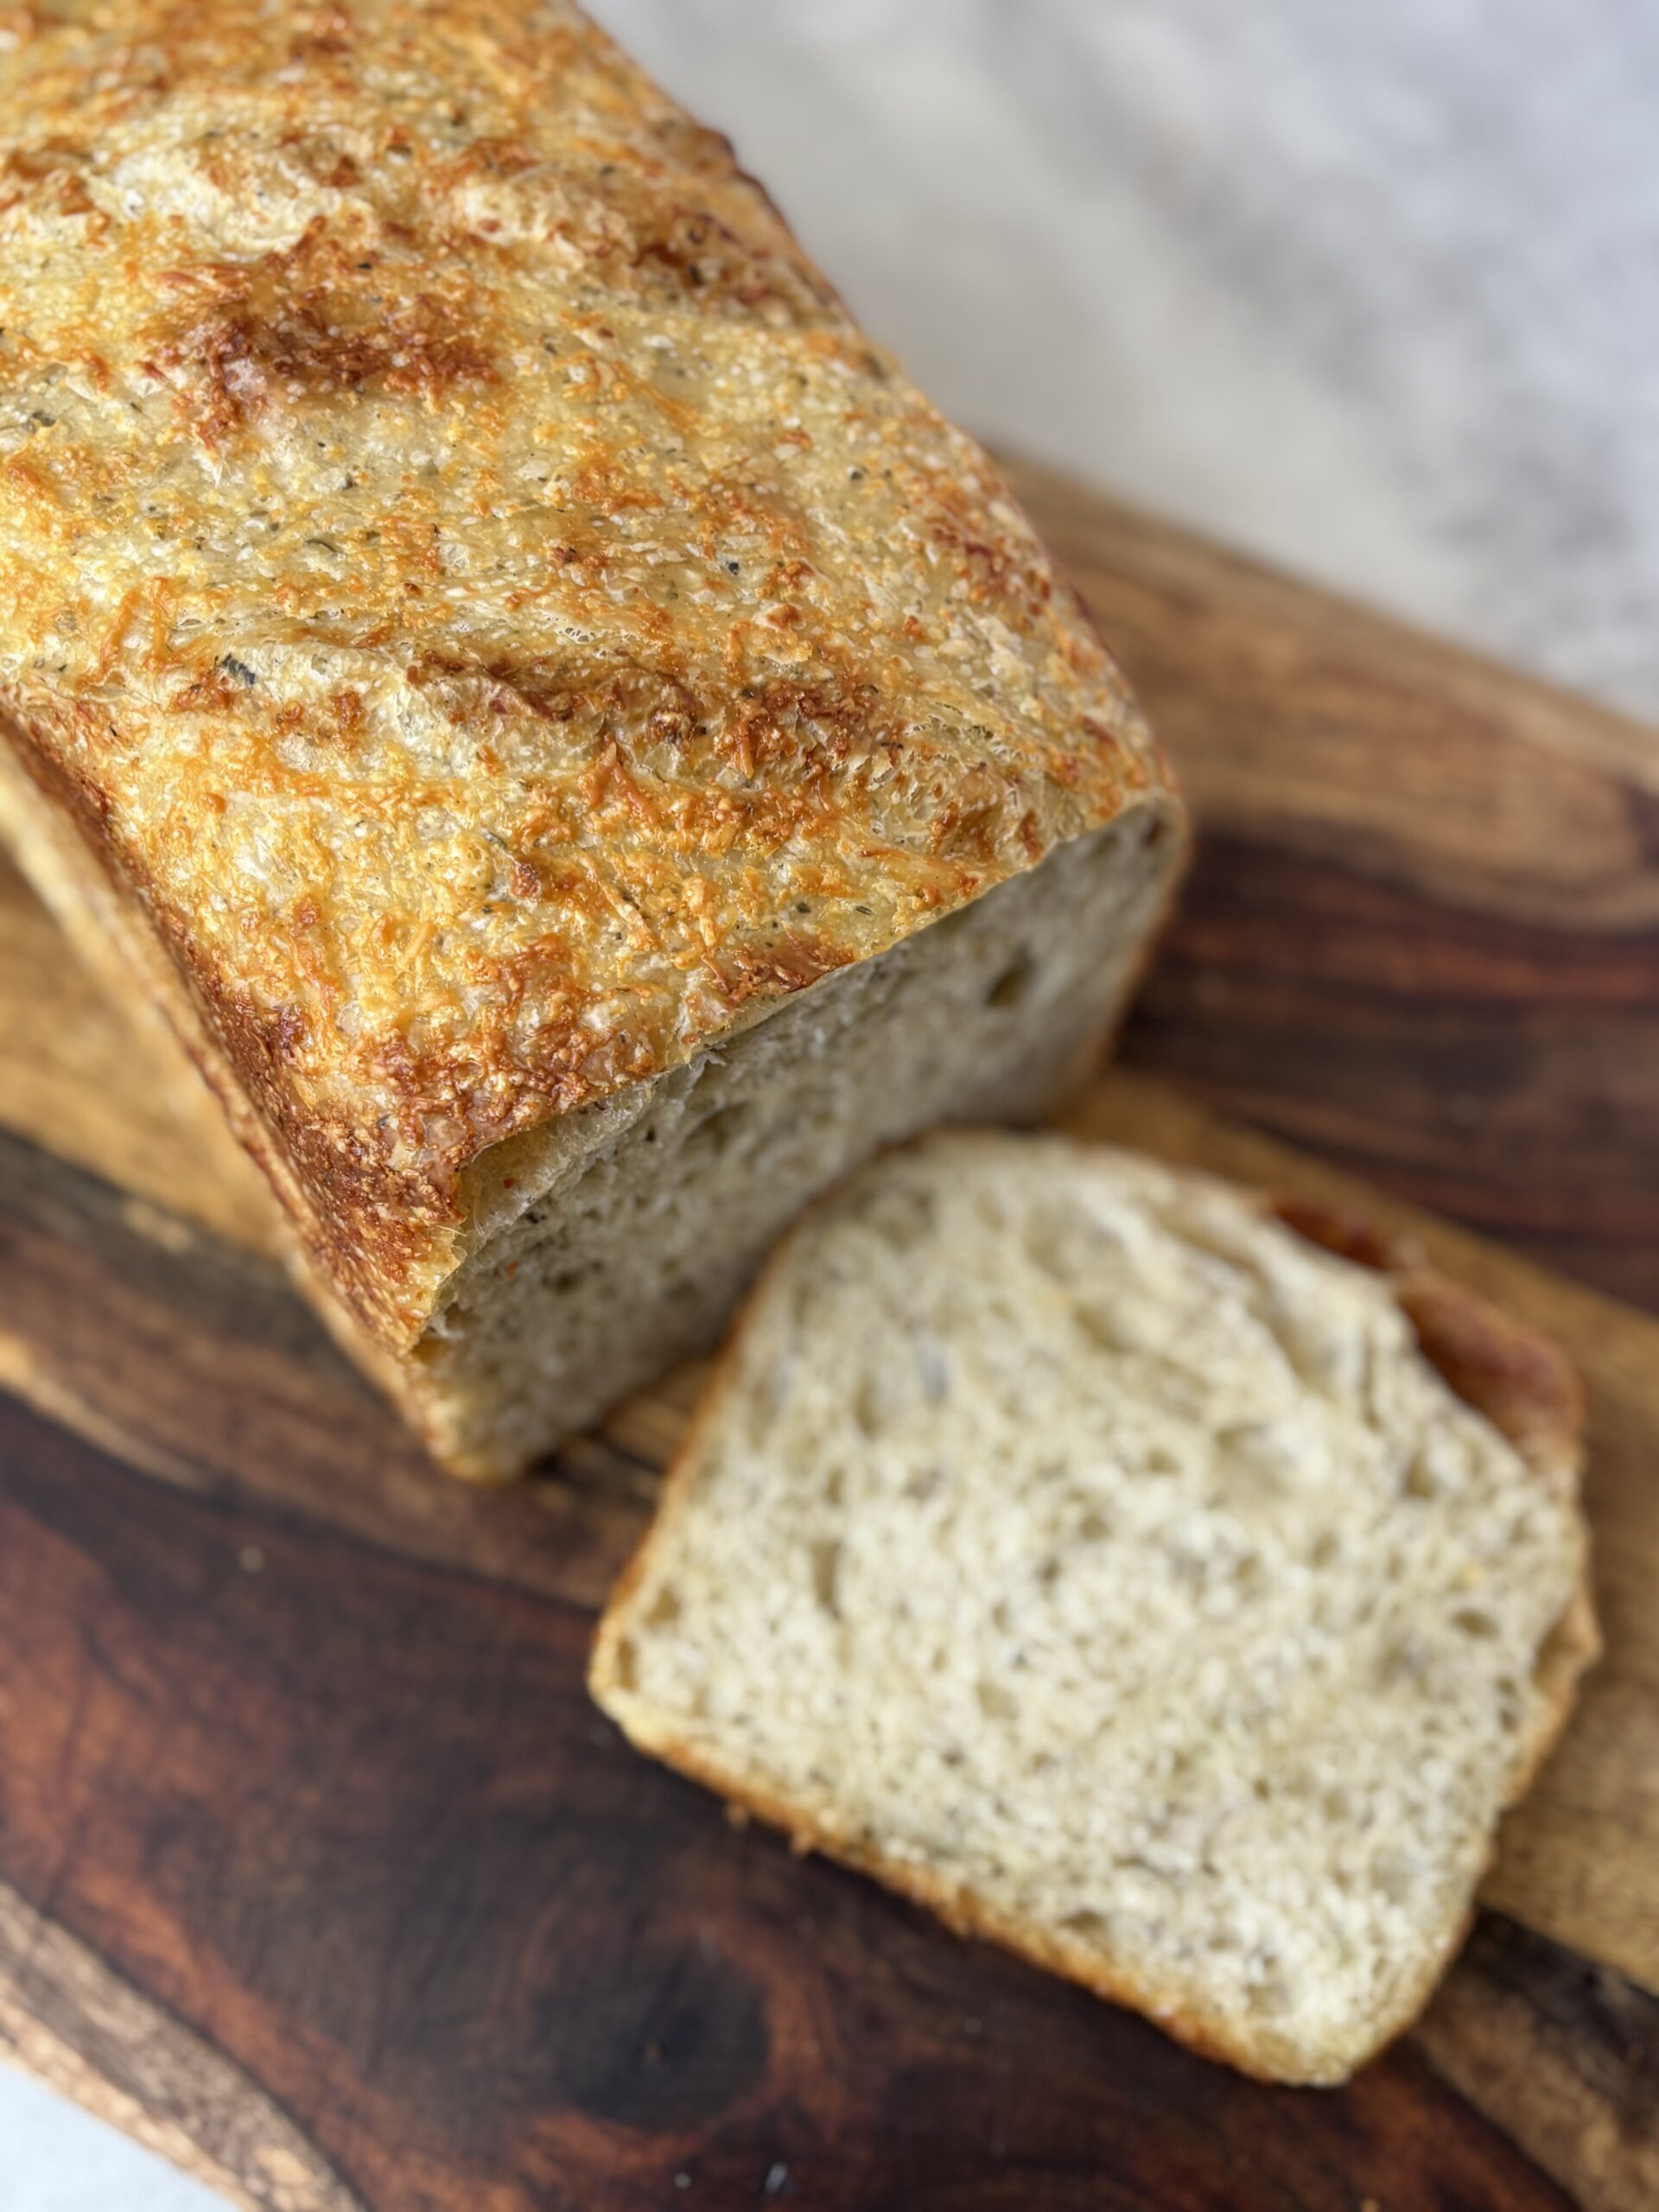
That’s where this Italian herb and cheese sourdough bread comes in.
This loaf has everything you already love about the original—soft texture, tangy sourdough flavor, and simple ingredients—but with the addition of Italian seasoning, cheese folded right into the dough, and a golden, cheesy topping that makes your kitchen smell amazing while it bakes.
Why You’ll Love This Italian Herb and Cheese Bread:
- Herby and aromatic – Italian seasoning is mixed right into the dough.
- Savory cheese throughout – Parmesan and Asiago add little cheesy pockets in every slice.
- Gorgeous cheesy crust – Topped with more cheese for that classic Italian bakery vibe.
- Same soft interior – You still get the perfect sandwich loaf texture you know and love.
If you’ve made my original soft sandwich bread, this version will feel super familiar—but the added flavor takes it to a whole new level. And if you’re new here, welcome! This is a great place to start.
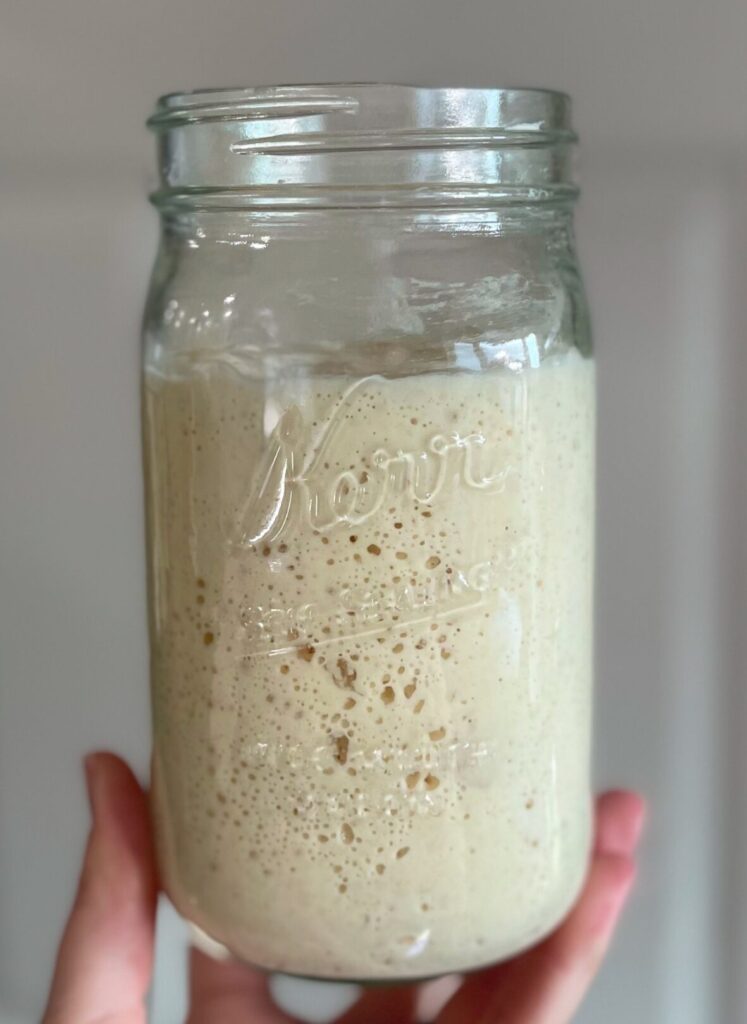
Feeding Your Sourdough Starter:
Before starting your dough, make sure your sourdough starter is healthy and active. About 6 hours before (or the night before) you begin, feed your starter with a 1:1:1 ratio—60g of starter, 60g of unbleached flour, and 60g of water. This ensures that your starter is bubbly and ready to go. This recipe requires 150g of active sourdough starter. Feeding this amount will ensure you have enough for your recipe, and some (30g) left over to keep feeding.
Lets get Started!
Step 1: Mix the Dough
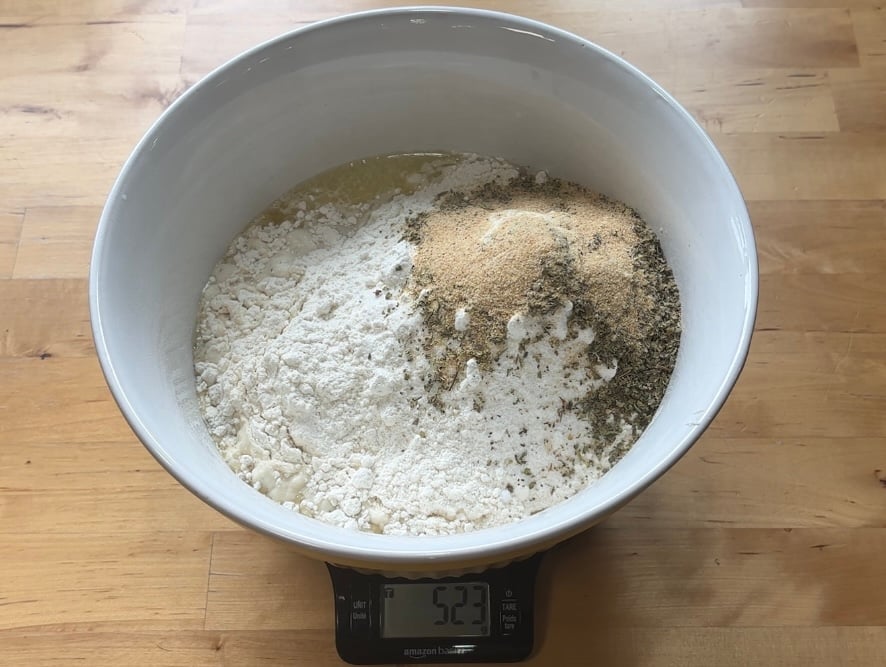
In a large mixing bowl, whisk together 150g active sourdough starter, 330g warm filtered water, 20g avocado oil, and 25g honey until combined. Then add in 500g unbleached flour, 10g salt, 5g (2 tsp.) Garlic powder and 4g (2 tbsp.) Italian seasoning. Mix until a shaggy dough forms. Cover and let it rest in a warm (not hot) place for 1 hour.
Step 2: Stretch & Fold and add Cheese
Perform a total of 3 sets of stretch and folds every 30 minutes to build structure in the dough. To stretch and fold, spray or wet your hands with water to prevent the dough from sticking. Then, gently pull one side of the dough up and fold it into the middle, rotate the bowl and repeat on all four sides.
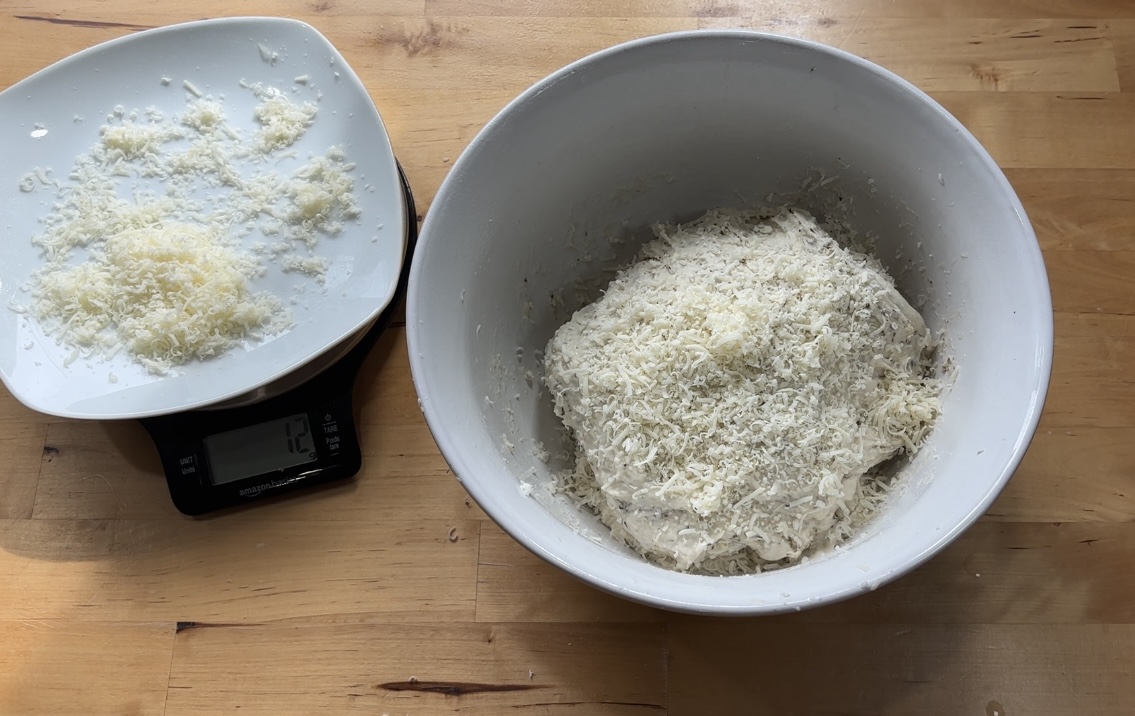
After the First stretch and fold, finely grate your parmesan and asiago cheese 40g of each equaling 80g total. You will add a portion of it (50g) to the dough during your next stretch and fold. Save the rest (30g) for the top of your loaf before baking.
During the second stretch and fold, gradually incorporate 50g of finely shredded cheese. To do this, sprinkle a portion of the cheese over the dough before each stretch and fold motion. Stretch, fold, add more cheese, and continue until it is evenly distributed in layers throughout the dough. I make sure my cheese is finely graded to prevent big bubbles from forming in the dough. Once again, don’t forget to reserve the extra 30g of cheese for the top of your loaf later!
I like to make sure I do 1 stretch and fold before adding the cheese. Stretch and folds help develop the gluten and will give your dough necessary structure before adding the cheese. This prevents your dough from tearing and being too weak.
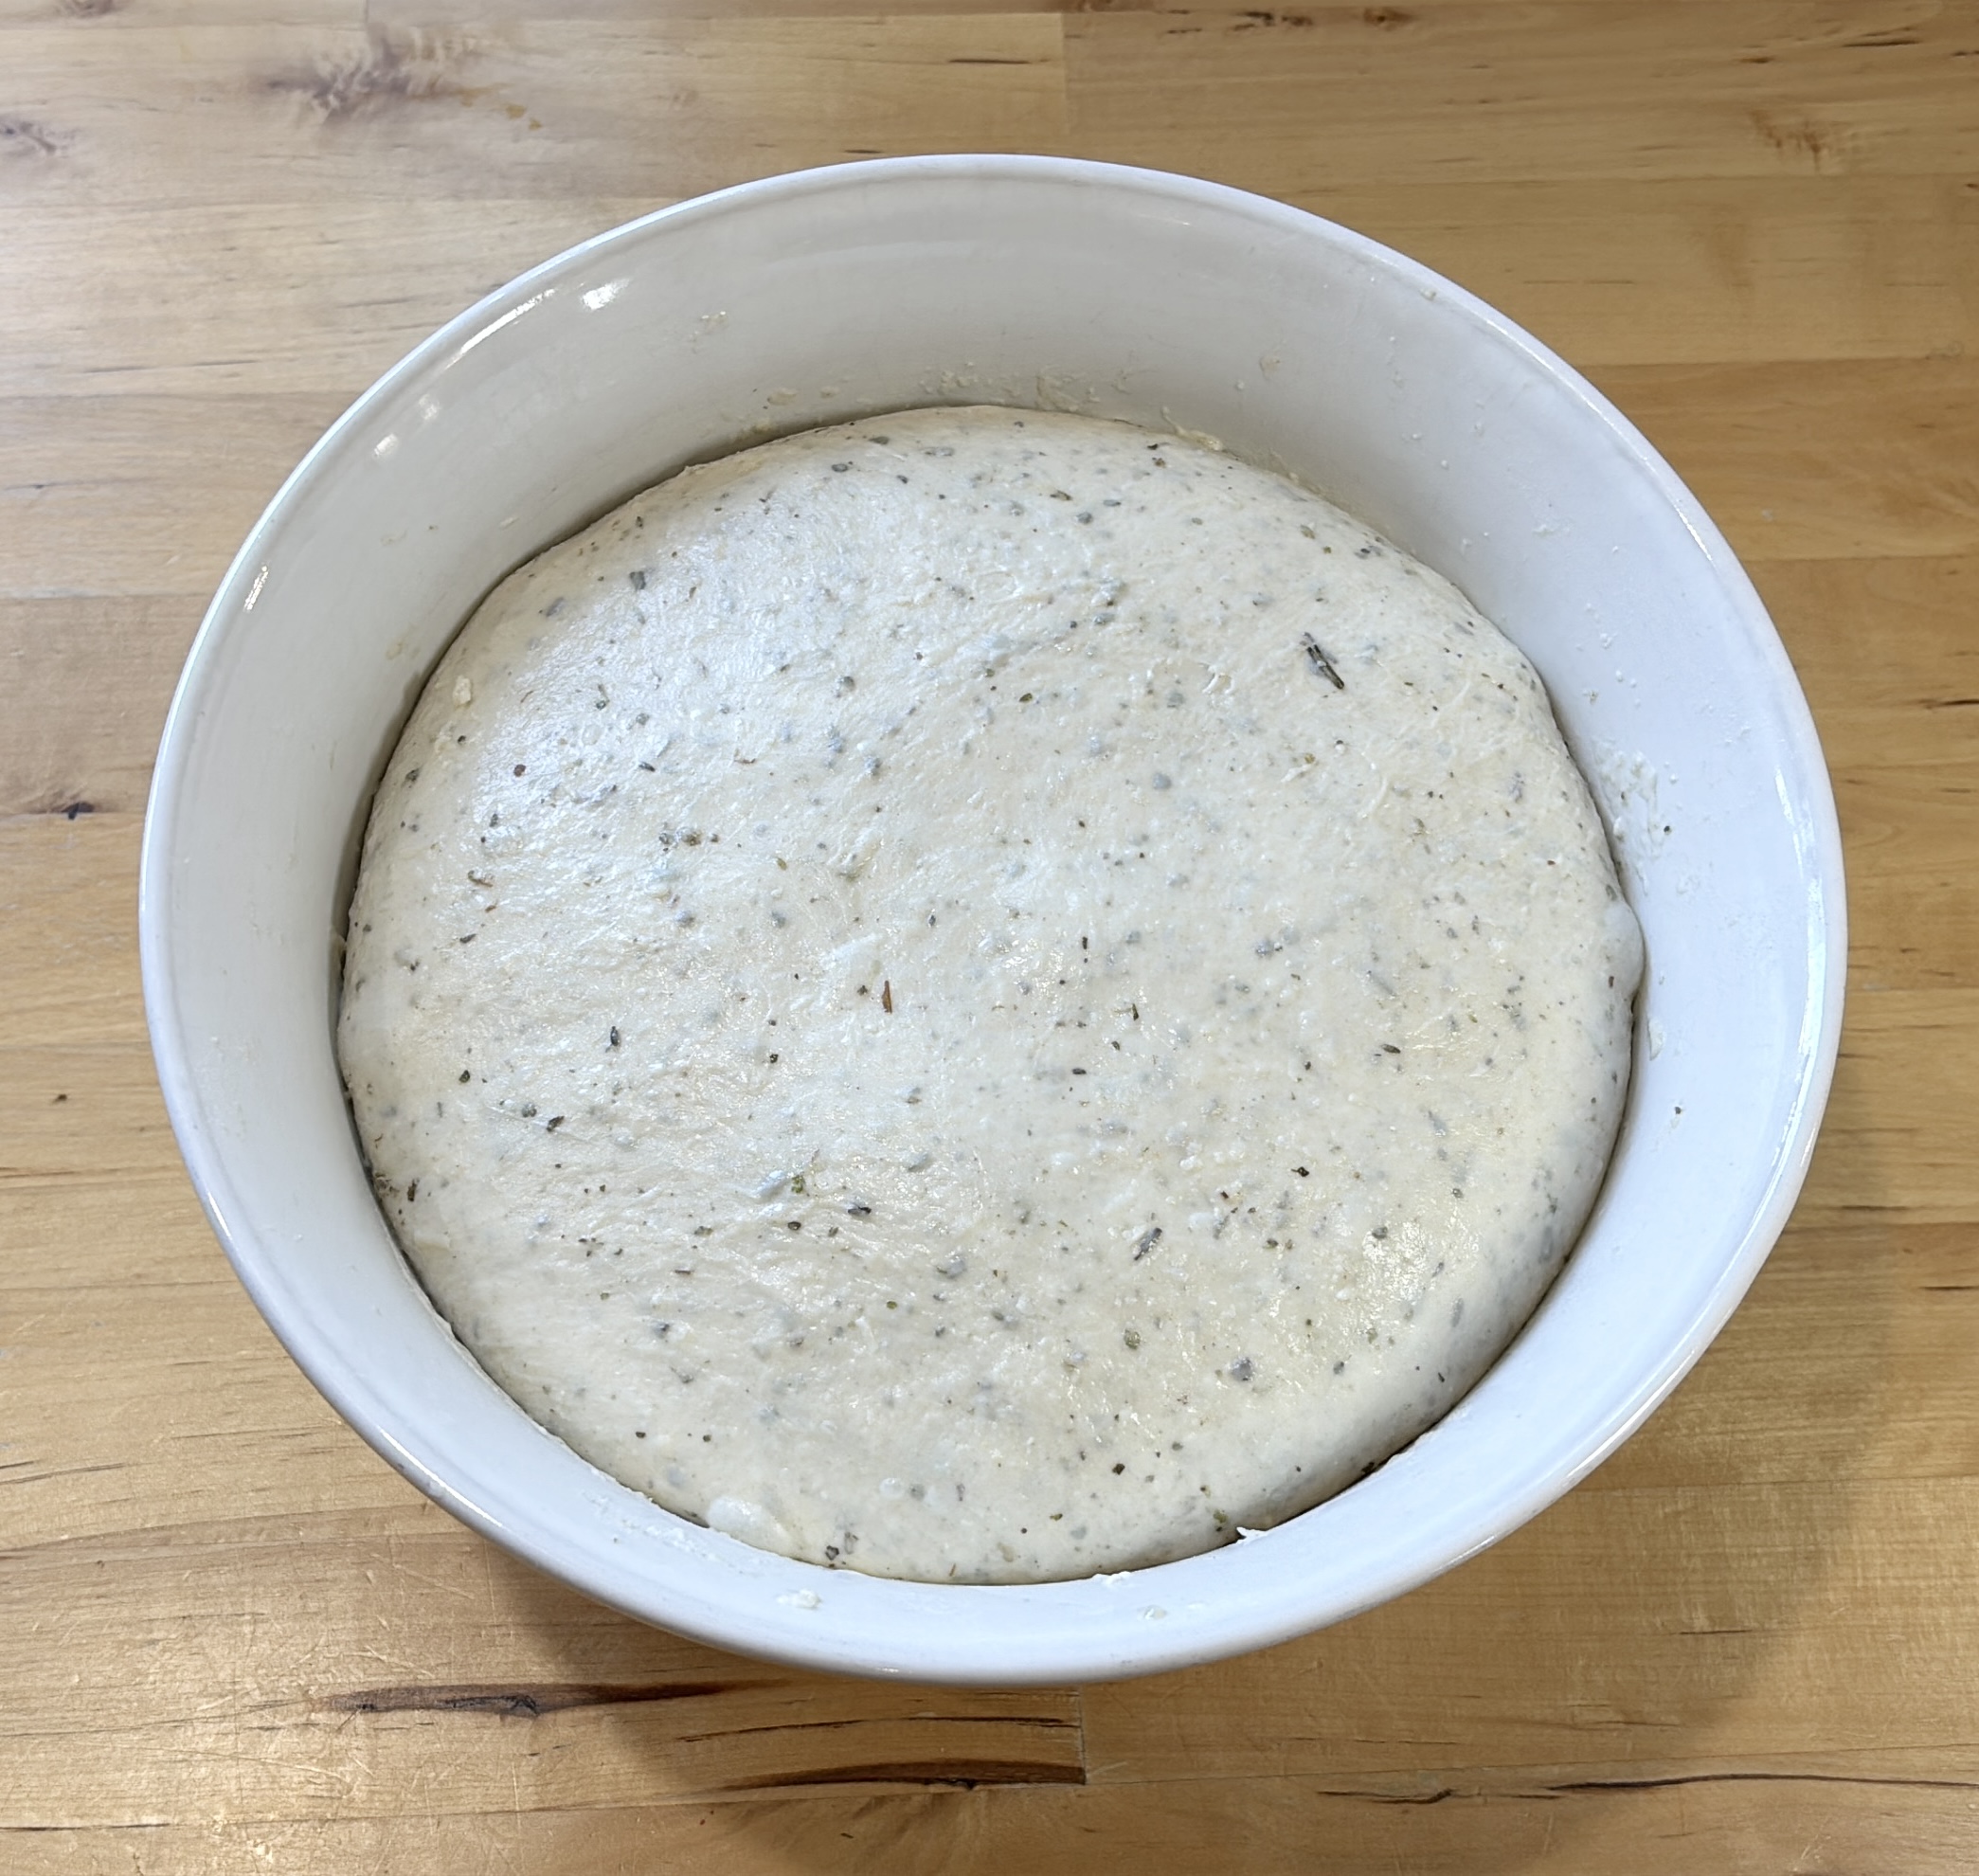
Step 3: Bulk Ferment
Cover and let the dough continue to bulk ferment at room temperature. (If your home is cooler, you can also do this overnight.)
Bulk fermentation starts as soon as your dough is mixed, but the timing will be different for everyone. It depends on your dough temperature, the climate in your home, and even the type of flour you use.
Warmer dough will ferment faster, while cooler dough will take longer. I like to keep mine in a warm spot to help speed things up.
Instead of timing dough, I use visual cues to know when it’s ready: the dough should look just about doubled in size, bubbly, and airy. It will also jiggle when you shake the bowl.
For reference, this dough took about 6 hours at 80°F to achieve that!
- A note about cheese and bulk fermentation. I’ve had a few people ask if it’s safe to let cheese sit out in the dough during the long bulk ferment at room temperature—and I totally get the concern! But here’s how I think of it: enriched doughs like cinnamon rolls often have eggs and milk and sit out for 10+ hours with no issues. I’ve never had a problem doing the same with cheese in this recipe. But of course, like anything, use your discretion!
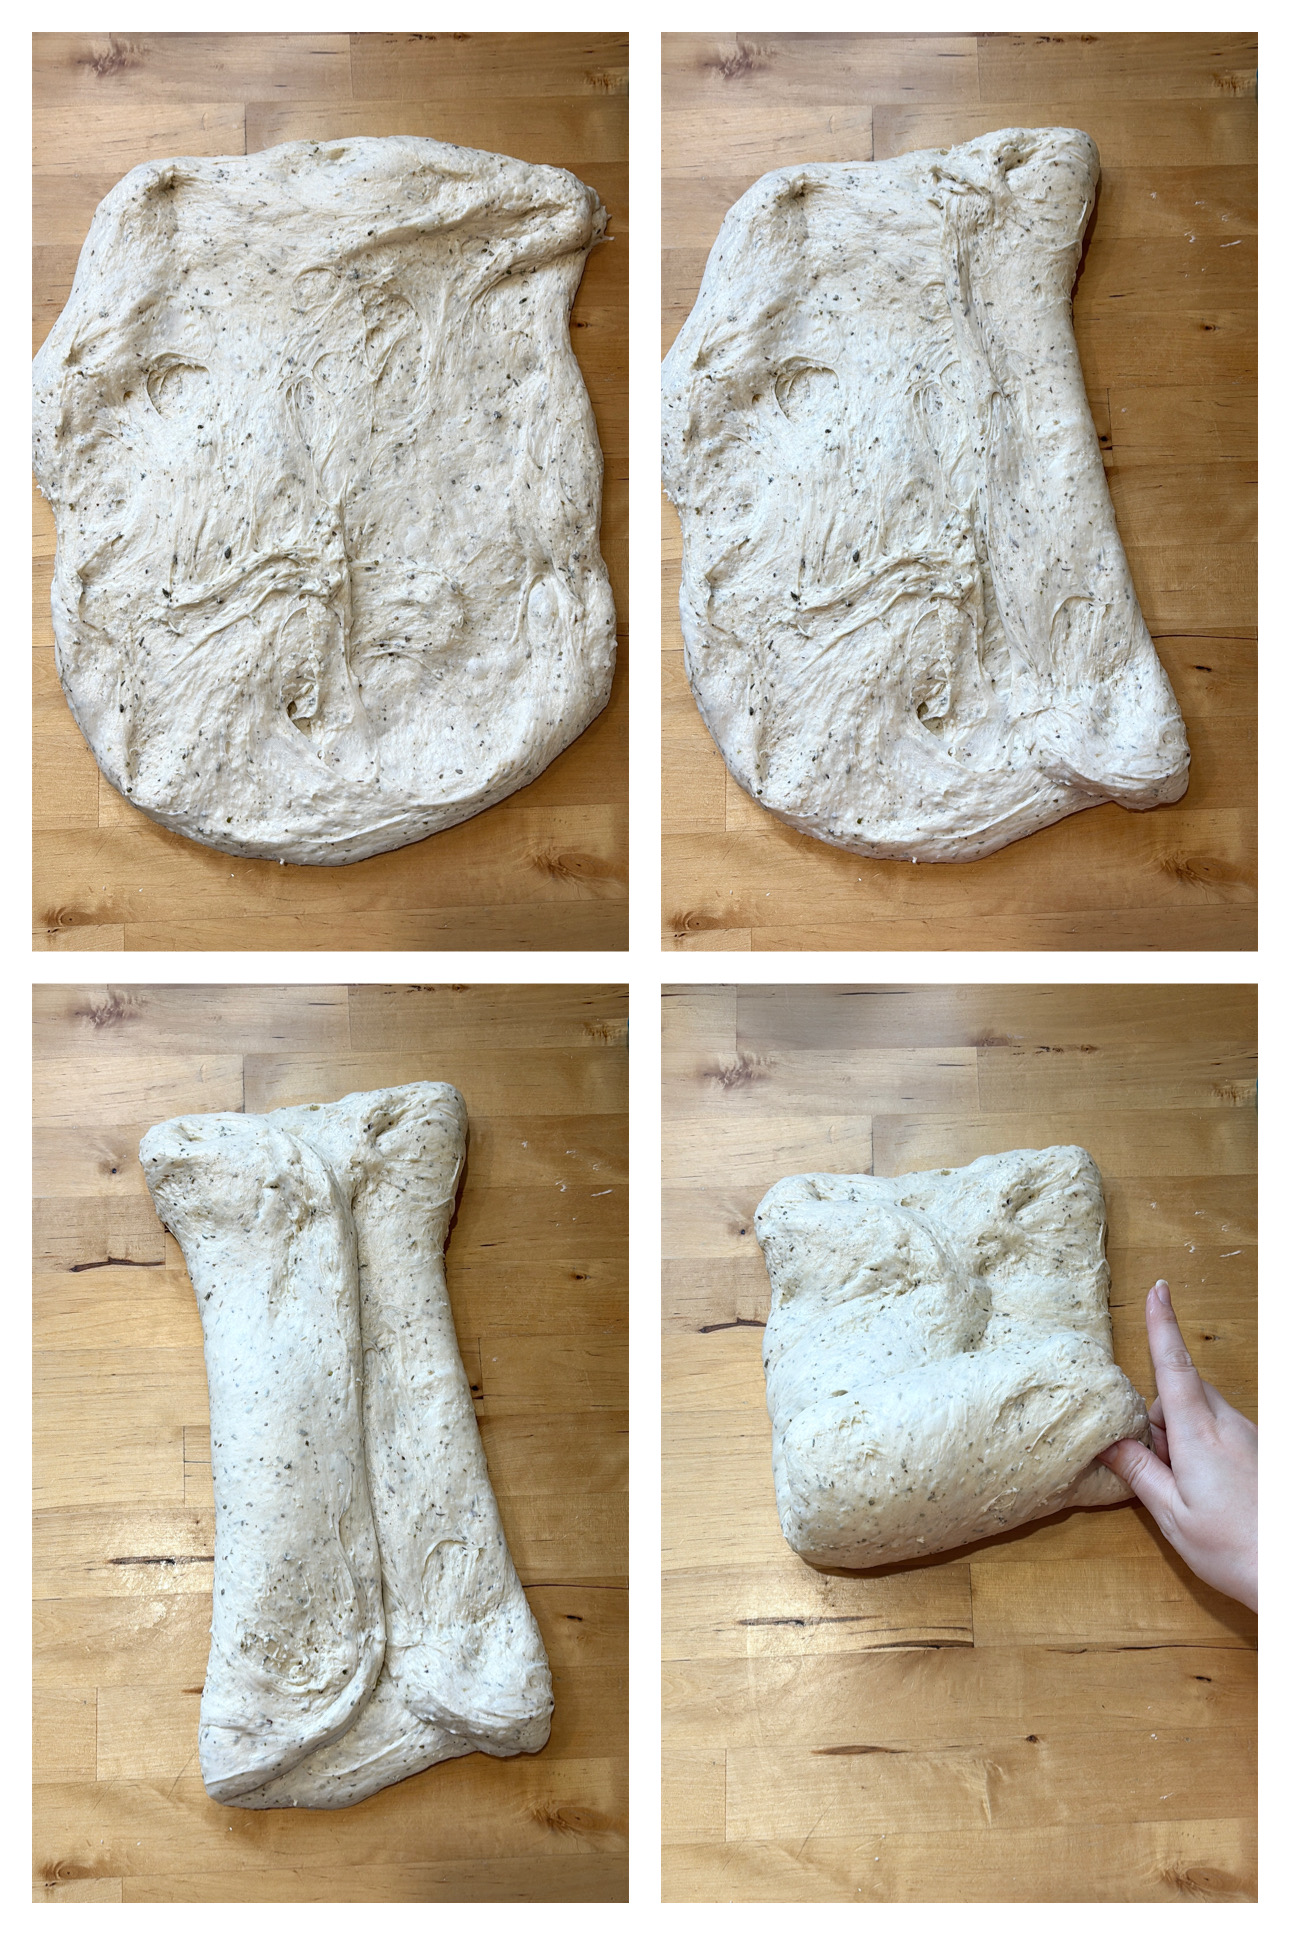
Step 4: Shape the Dough
Dump the dough from the bowl onto a clean surface. Spray or wet your hands with water to prevent the dough from sticking. Gently shape the dough into a loaf by stretching it into a rectangle, folding in the right side to the middle, then the left side into the middle, and rolling upward into a log. I also show this technique in my video below. Place it seam-side down in a well greased loaf pan.
Step 5: Second Rise–Proof
Now it’s time for the second rise. You have two options:
- Same day option: Let it proof at room temperature for about 2 more hours before baking. The dough should fill the pan and be very puffy when it’s ready. Time for proofing depends on temperature as well. To speed this up, put dough in a warm place. To slow it down keep it cooler.
- Overnight cold proof: Let it cold proof in the refrigerator overnight or up to 24hrs. If you choose this method, you may need to let your dough sit at room temperature and rise a bit before baking.
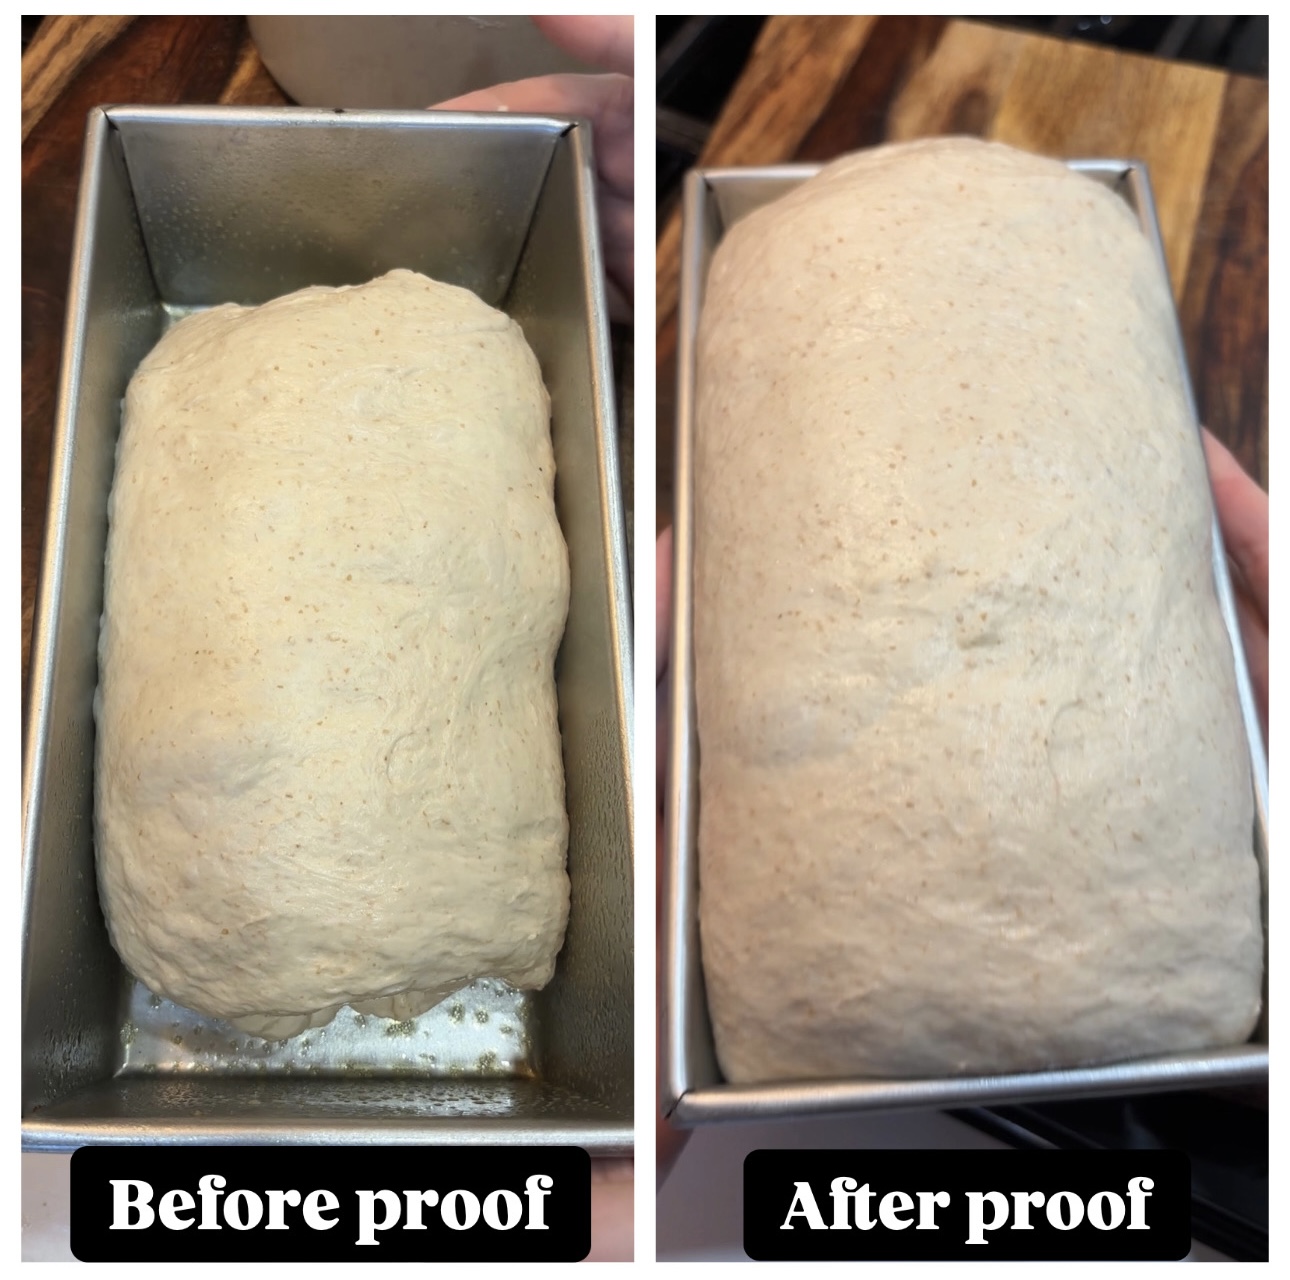
an example of how your dough should look before and after the proof.
Step 6: Bake
- Preheat oven to 400°F (200°C).
- Score the top of the dough and spray it lightly with water. Add the remaining 30g of cheese to the top of the dough.
- Cover with an inverted second loaf pan (or loosely greased foil*) to trap steam for the softest loaf. The inverted loaf pan method is shown below.
- Bake for 30 minutes at 400°F, then uncover and bake for 15 minutes at 375°F.

*If you’re using foil instead of another bread pan, make sure to lightly grease it and shape it like a loose tent—don’t wrap it too tightly
Step 7: Check for Doneness
Use a digital thermometer—your bread is fully baked when the internal temperature reaches 205°F (96°C).
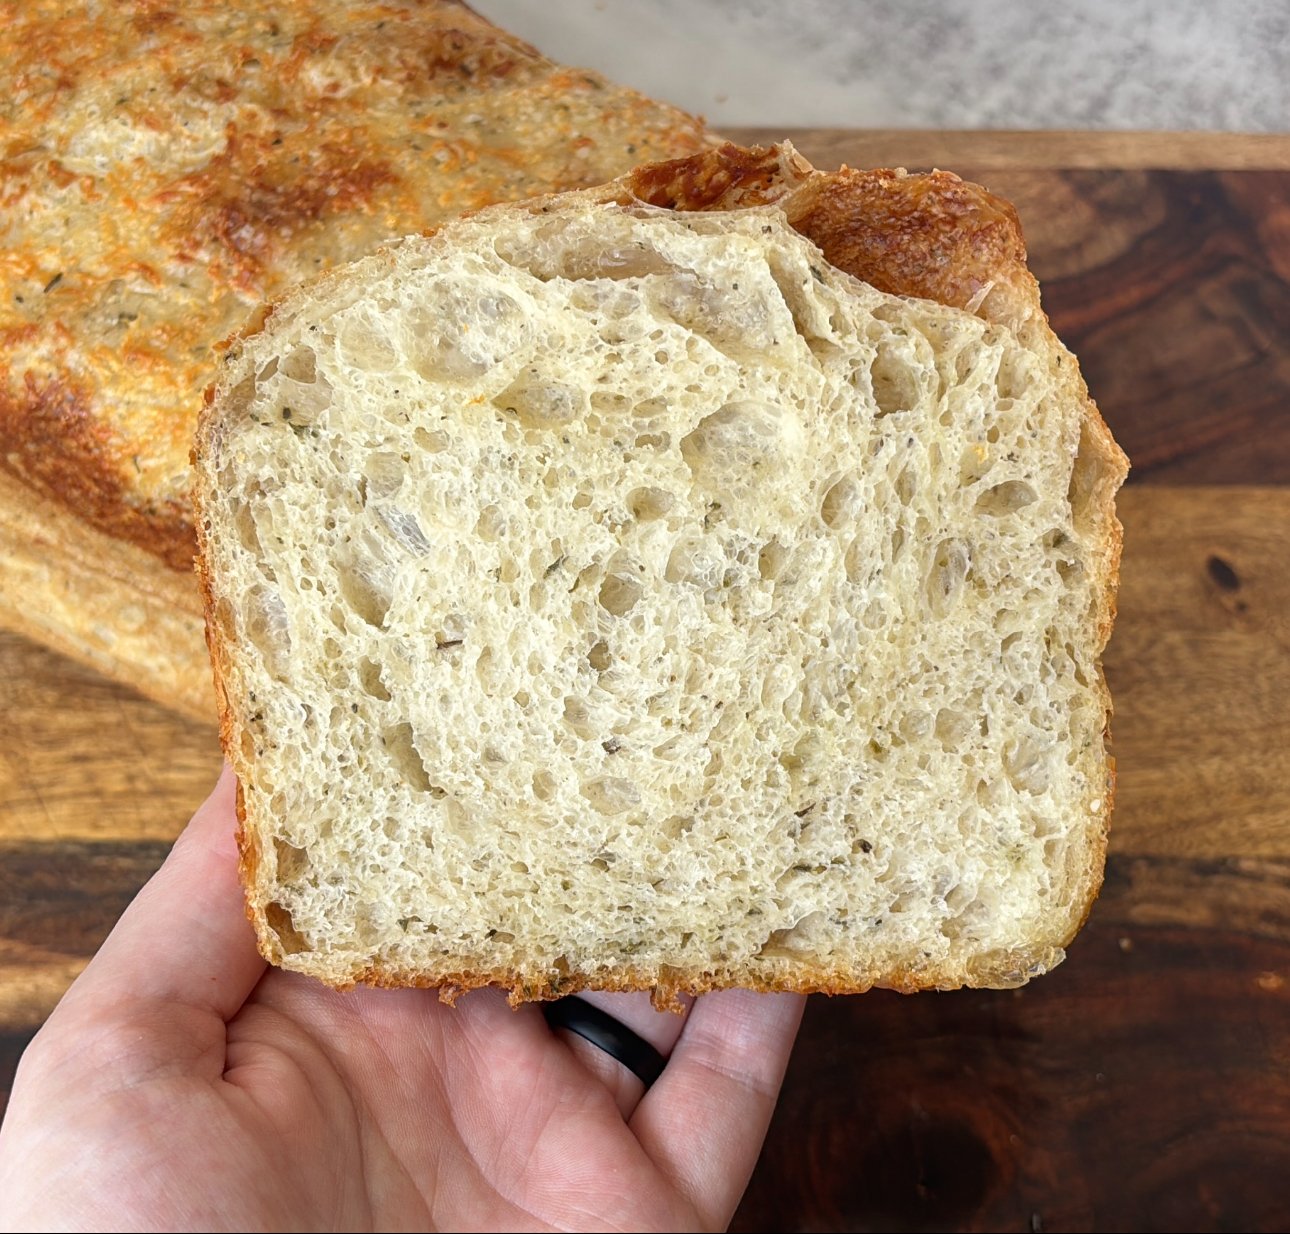
Step 8: Cool & Enjoy!
Remove from the pan immediately and let it cool completely before slicing. This helps set the crumb and keeps it soft. Enjoy your fresh Italian herb and cheese sourdough bread!
How to store:
To keep my sourdough fresh, I store it in these sandwich bags from Amazon, which come with twist ties and mimic traditional storage methods. I usually keep the loaf on the counter for up to 2 days, then slice and freeze any leftovers. Sourdough freezes exceptionally well—just thaw slices as needed for fresh-tasting bread anytime!

Italian Herb & Cheese Soft Sourdough Sandwich Bread
Equipment
- 1 Medium/Large bowl
- 1 Cheese Grater
- 2 Bread Pans or 1 bread pan and and foil to cover it (see instructions)
- 1 Spray Bottle filled with water
- 1 Long sandwich bag for storing
Ingredients
Feeding Sourdough Starter
- 60 g Sourdough Starter
- 60 g Unbleached flour
- 60 g Filtered water room temperature
Dough
- 150 g active sourdough starter
- 330 g Warm water 80–90°F
- 25 g Honey
- 20 g Avocado oil can sub for olive oil
- 500 g Unbleached Flour All purpose or bread flour work
- 10 g Sea Salt
- 4 g or 2 tbsp. Italian Seasoning
- 5 g or 2 tsp. Garlic Powder
Cheese Inclusion and Topping
- 40 g Parmesan Cheese Freshly grated
- 40 g Asiago Cheese Freshly grated
Instructions
Feeding Sourdough Starter (night before):
- About 4-6 hours before (or the night before) you make your dough, feed your sourdough starter. In a jar add 60g of starter, 60g of unbleached flour, and 60g of water. Mix, loosely cover, and let it rise until its doubled in size, active, and no longer growing.
Dough (Morning):
- Mix: In a large mixing bowl, whisk together 150g active sourdough starter, 330g warm filtered water, 20g avocado oil, and 25g honey until combined. Then add in 500g unbleached flour, 10g salt, 5g (2 tsp.) Garlic powder and 4g (2 tbsp.) Italian seasoning. Mix until a shaggy dough forms. Cover and let it rest in a warm (not hot) place for 1 hour.
- Stretch and fold & add cheese: Perform a total of 3 sets of stretch and folds every 30 minutes to build structure in the dough. To stretch and fold, spray or wet your hands with water to prevent the dough from sticking. Then, gently pull one side of the dough up and fold it into the middle, rotate the bowl and repeat on all four sides.After the first stretch and fold, finely grate your parmesan and asiago cheese 40g of each equaling 80g total and set aside. You will add a portion of it (50g) to the dough during your next stretch and fold. Save the rest (30g) for the top of your dough before baking.During the second stretch and fold, gradually incorporate 50g of finely shredded cheese. To do this, sprinkle a portion of the cheese over the dough before each stretch and fold motion. Stretch, fold, add more cheese, and continue until it is evenly distributed in layers throughout the dough.During the third stretch and fold, try to keep the cheese all inside of the dough as much as possible.I make sure my cheese is finely graded to prevent big bubbles from forming in the dough. Once again, don’t forget to reserve the extra 30g of cheese for the top of your dough later!
- Bulk Ferment: Cover and let the dough continue to bulk ferment at room temperature. (If your home is cooler, you can also do this overnight.)Bulk fermentation starts as soon as your dough is mixed, but the timing will be different for everyone. Warmer dough will ferment faster, while cooler dough will take longer. I like to keep mine in a warm spot to help speed things up.Instead of timing dough, I use visual cues to know when it’s ready: the dough should look about doubled in size, bubbly, and airy. It will also have a slight jiggle when you shake the bowl. For reference, this dough took about 6 hours at 80°F to achieve that!
- Shaping: Once your dough is ready, dump the dough from the bowl onto a clean surface. Spray or wet your hands with water to prevent the dough from sticking. Gently shape the dough into a loaf by stretching it into a rectangle, folding in the right side to the middle, then the left side into the middle, and rolling upward into a log. I also show this technique in my video below. Place it seam-side down in a well greased loaf pan.
- Proof/second rise. You have two options:Same day option: Let it proof at room temperature for about 2 more hours before baking. The dough should fill the pan and be very puffy when it’s ready. Time for proofing depends on temperature as well. To speed this up, put dough in a warm place. To slow it down keep it cooler.Overnight cold proof: Let it cold proof in the refrigerator overnight or up to 24hrs. If you choose this method, you may need to let your dough sit at room temperature and rise a bit before baking.
- Prepare and bake: Preheat oven to 400°F (200°C). Score the top of the dough and spray it lightly with water. Add the remaining 30g of cheese to the top of the dough. Cover with an inverted second loaf pan (or loosely greased foil*) to trap steam for the softest loaf. Bake for 30 minutes at 400°F, then uncover and bake for 15 minutes at 375°F.*If you're using foil instead of a pan, make sure to grease it and shape it like a loose tent over your bread pan.
- Using a digital thermometer, check the internal temperature of your bread. It is fully baked when the internal temperature reaches 205°F (96°C).
- Remove from the pan immediately and let it cool completely before slicing!
Video

Notes
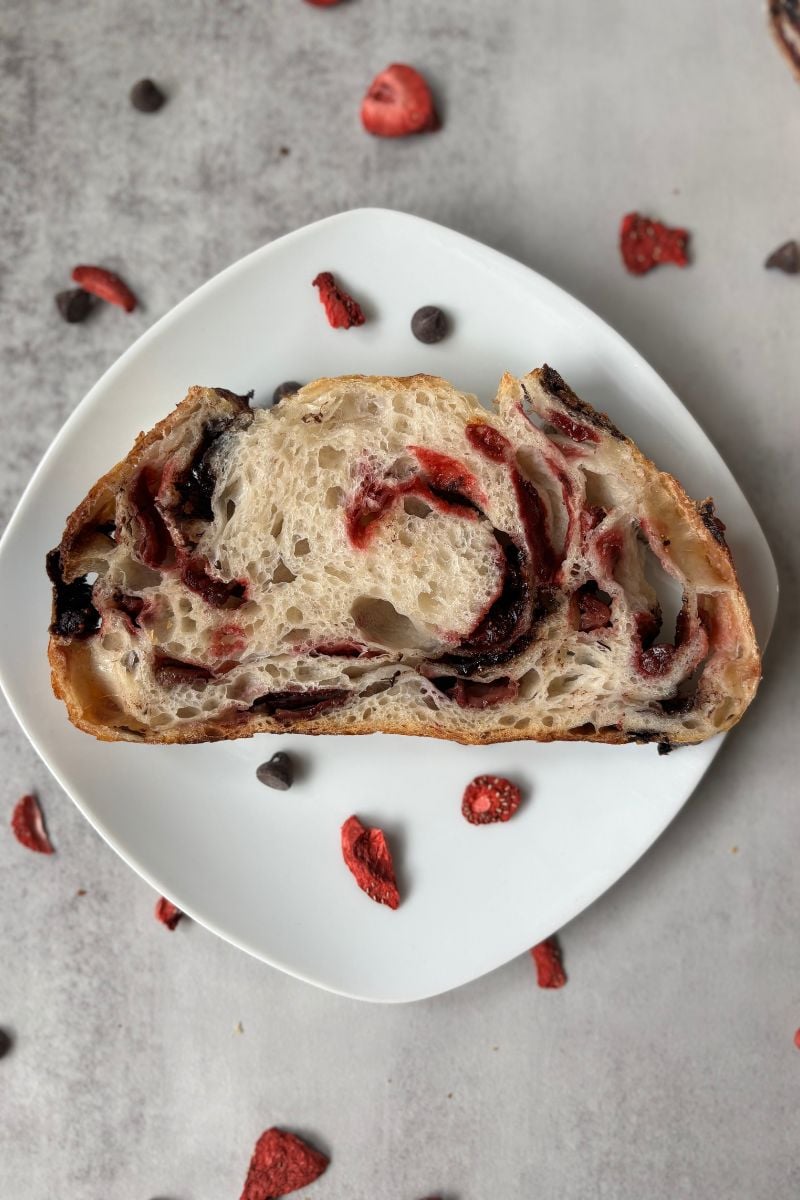
If you liked this recipe, you might also enjoy:
- Soft Sourdough Sandwich Bread – My most popular recipe! Light, fluffy, and perfect for everyday use.
- Hot Honey, Cheddar & Jalapeño Sandwich Bread – A sweet, spicy, and savory twist on the classic loaf.
- Easy Soft Sourdough French Bread – Soft on the outside and inside—great for garlic bread or dipping in soup.

6 responses to “Italian Herb & Cheese Soft Sourdough Sandwich Bread”
Bravissima! Buonissimo! Che meraviglia 🤗🇮🇹👍
Made it today it was delicious. Will def make again.
Made your herb sourdough. I used 300g white bread flour 200 whole wheat soooooo good. Thank you. I’m still a newbie. This is good!
Awesome
What size are your bread pans .
A lot of different sizes will work here but I use these bread pans. They are 10×5.