Everyone Loves a Cinnamon Raisin Swirl
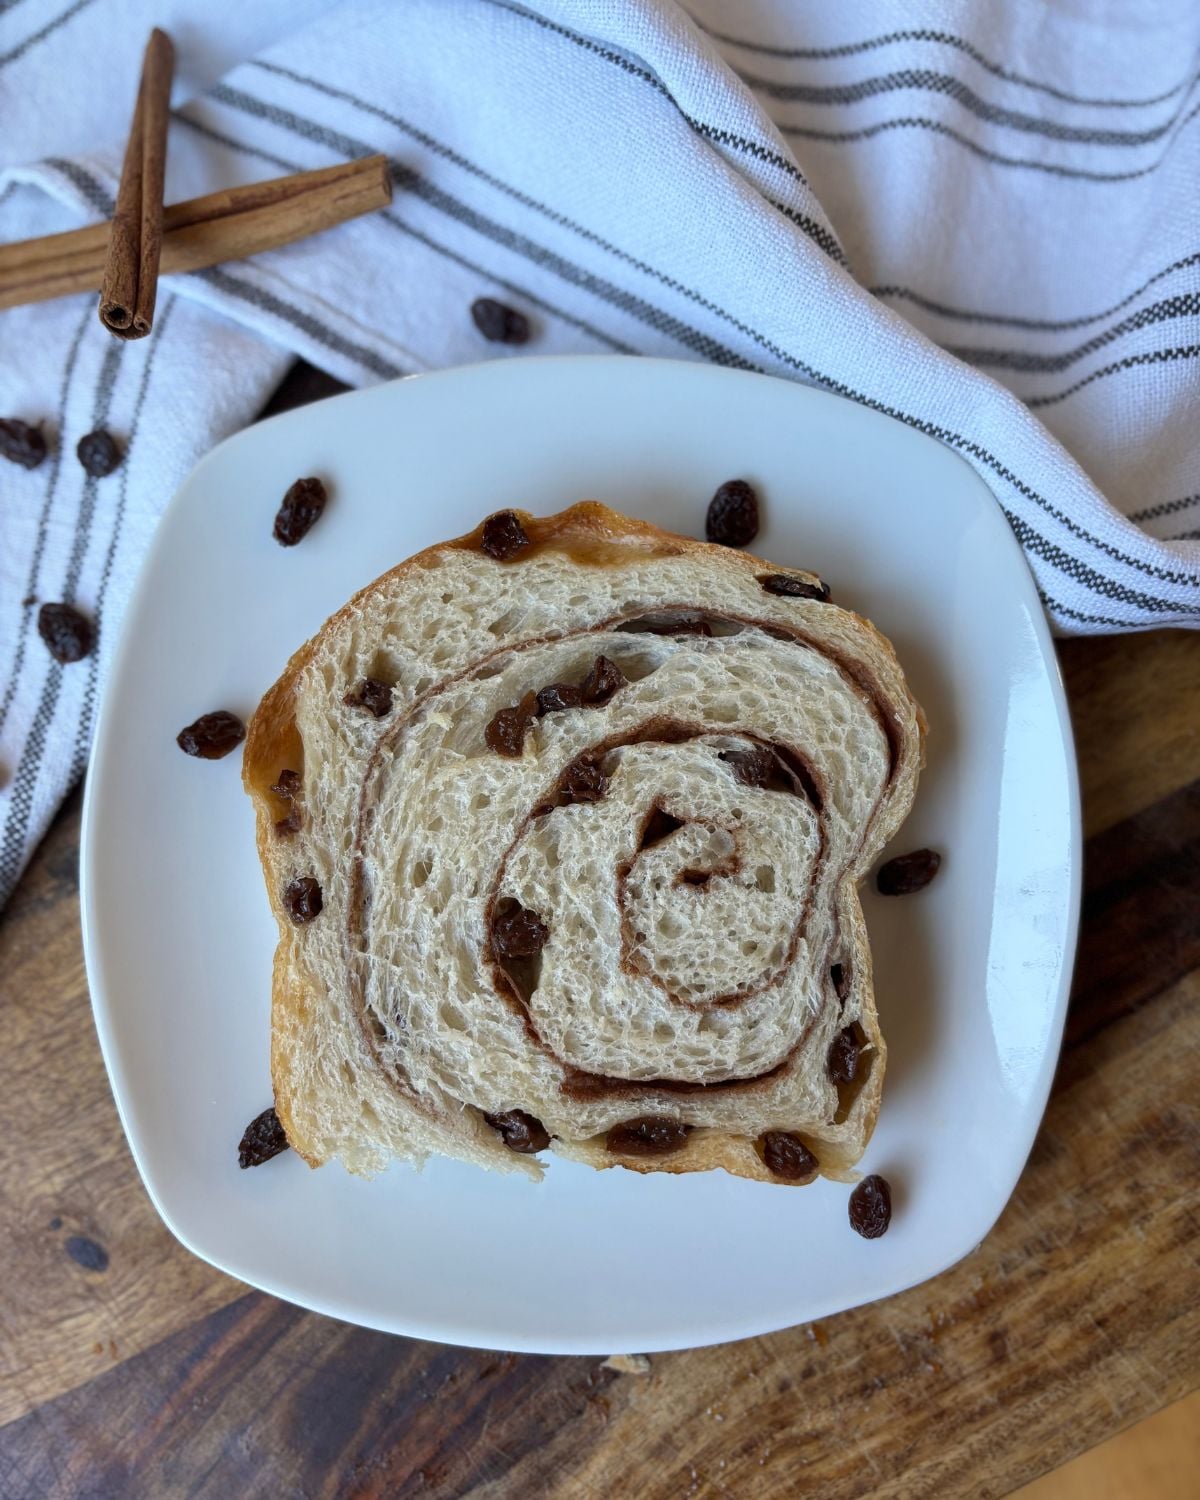
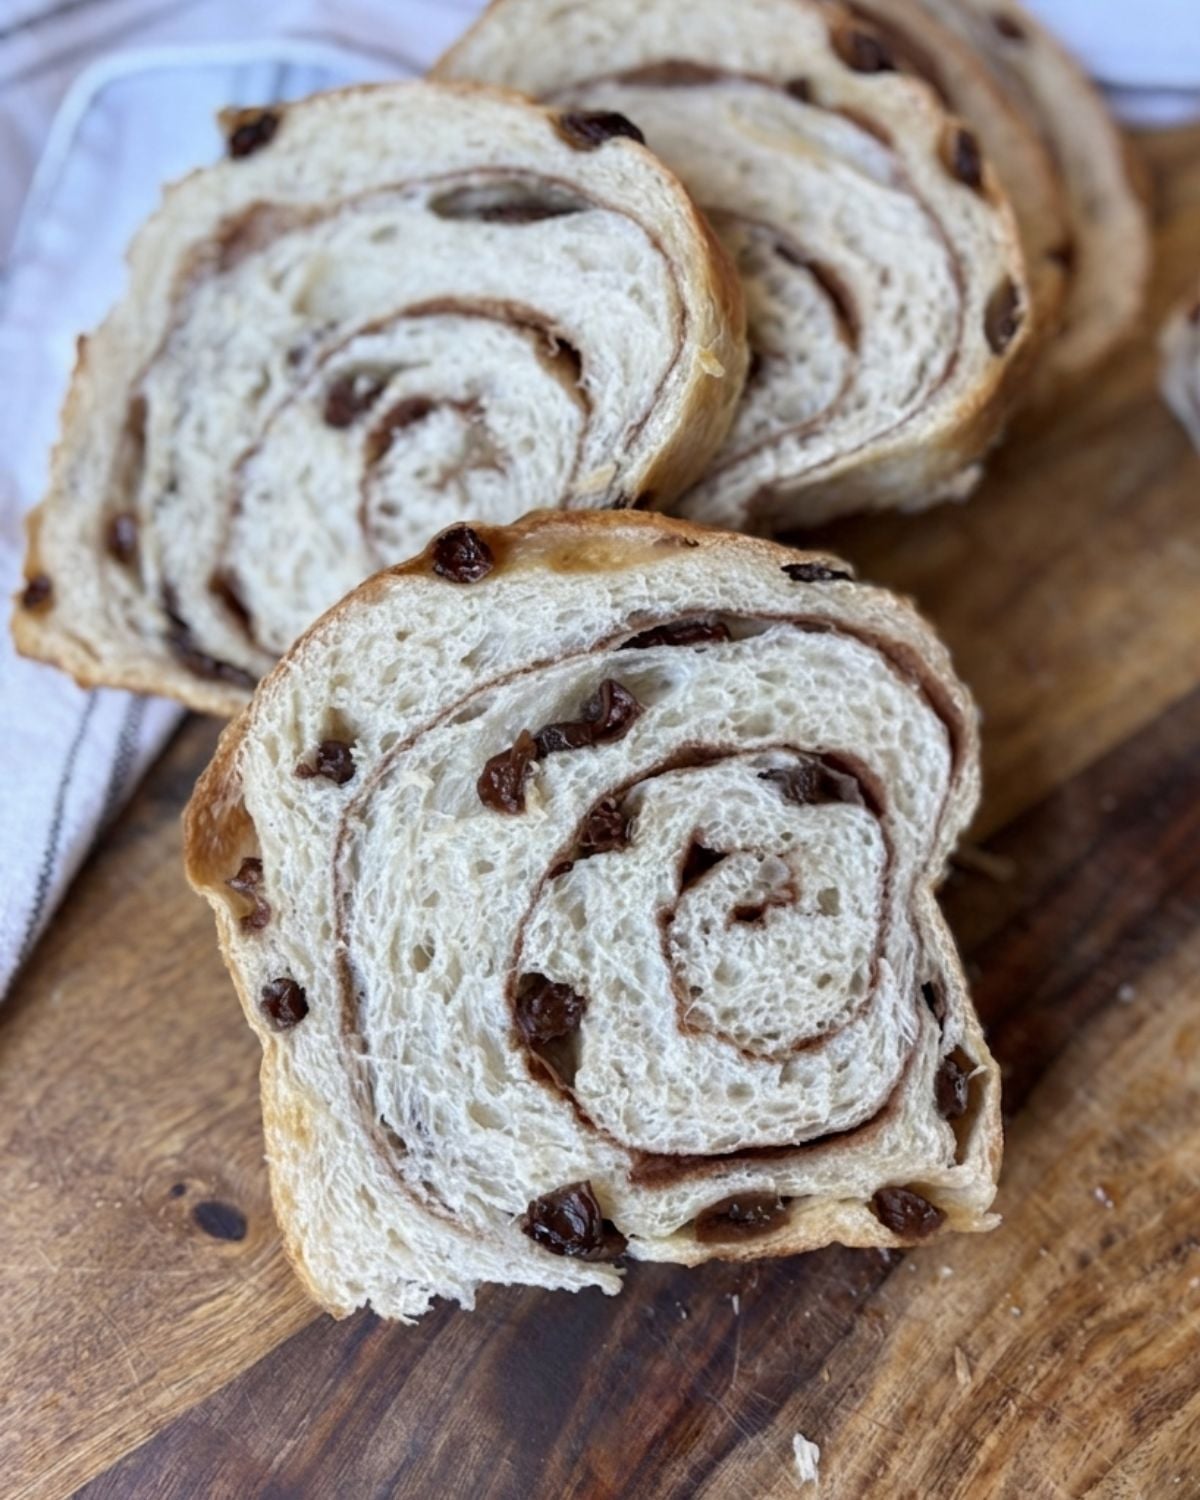
If you’ve already made my soft sourdough sandwich bread, you’re going to love this sourdough cinnamon raisin swirl version! My sandwich bread has become one of the most popular recipes on my website, and this recipe builds on that same soft, fluffy texture with a beautiful cinnamon sugar swirl and plenty of juicy raisins.
This recipe was tested over and over to make the shaping process as beginner friendly as possible without sacrificing the look or flavor of a classic cinnamon raisin swirl bread. If you can make a regular loaf of sourdough, you can absolutely make this one too. I’ll walk you through each step so you can bake it with confidence.
The finished loaf has all the nostalgia of the classic store bought cinnamon raisin bread, but with the subtle tang of sourdough that balances the cinnamon sugar sweetness perfectly. It’s delicious toasted with butter, and it makes the most incredible French toast. (That recipe is coming soon!)
This post may contain affiliate links. As an Amazon Associate I earn from qualifying purchases. This means I may earn a small commission at no additional cost to you if you make a purchase through one of my links. Thank you for using them and supporting my content!
Why I Know You’ll Love This Recipe
- Soft, fluffy sandwich bread texture
- Beginner friendly with same day and overnight options
- Beautiful cinnamon sugar swirl
- Nostalgic flavor with a subtle sourdough tang
- Perfect for toast or French toast
- Freezes beautifully
Feeding Your Sourdough Starter
Your starter should be active, bubbly, and at its peak before mixing your dough. I recommend feeding it the night before using a 1:5:5 ratio:
- 15g starter
- 75g flour
- 75g water
The recipe calls for 150g of active starter, this ratio will leave you with 15g extra to keep your starter going.
Need a starter? My dehydrated sourdough starter comes with step-by-step instructions to get it active and ready for baking in just a few days! Plus, she’s an Etsy Bestseller! 😉
Soft Sourdough Cinnamon Raisin Swirl Bread
Ingredients
Dough
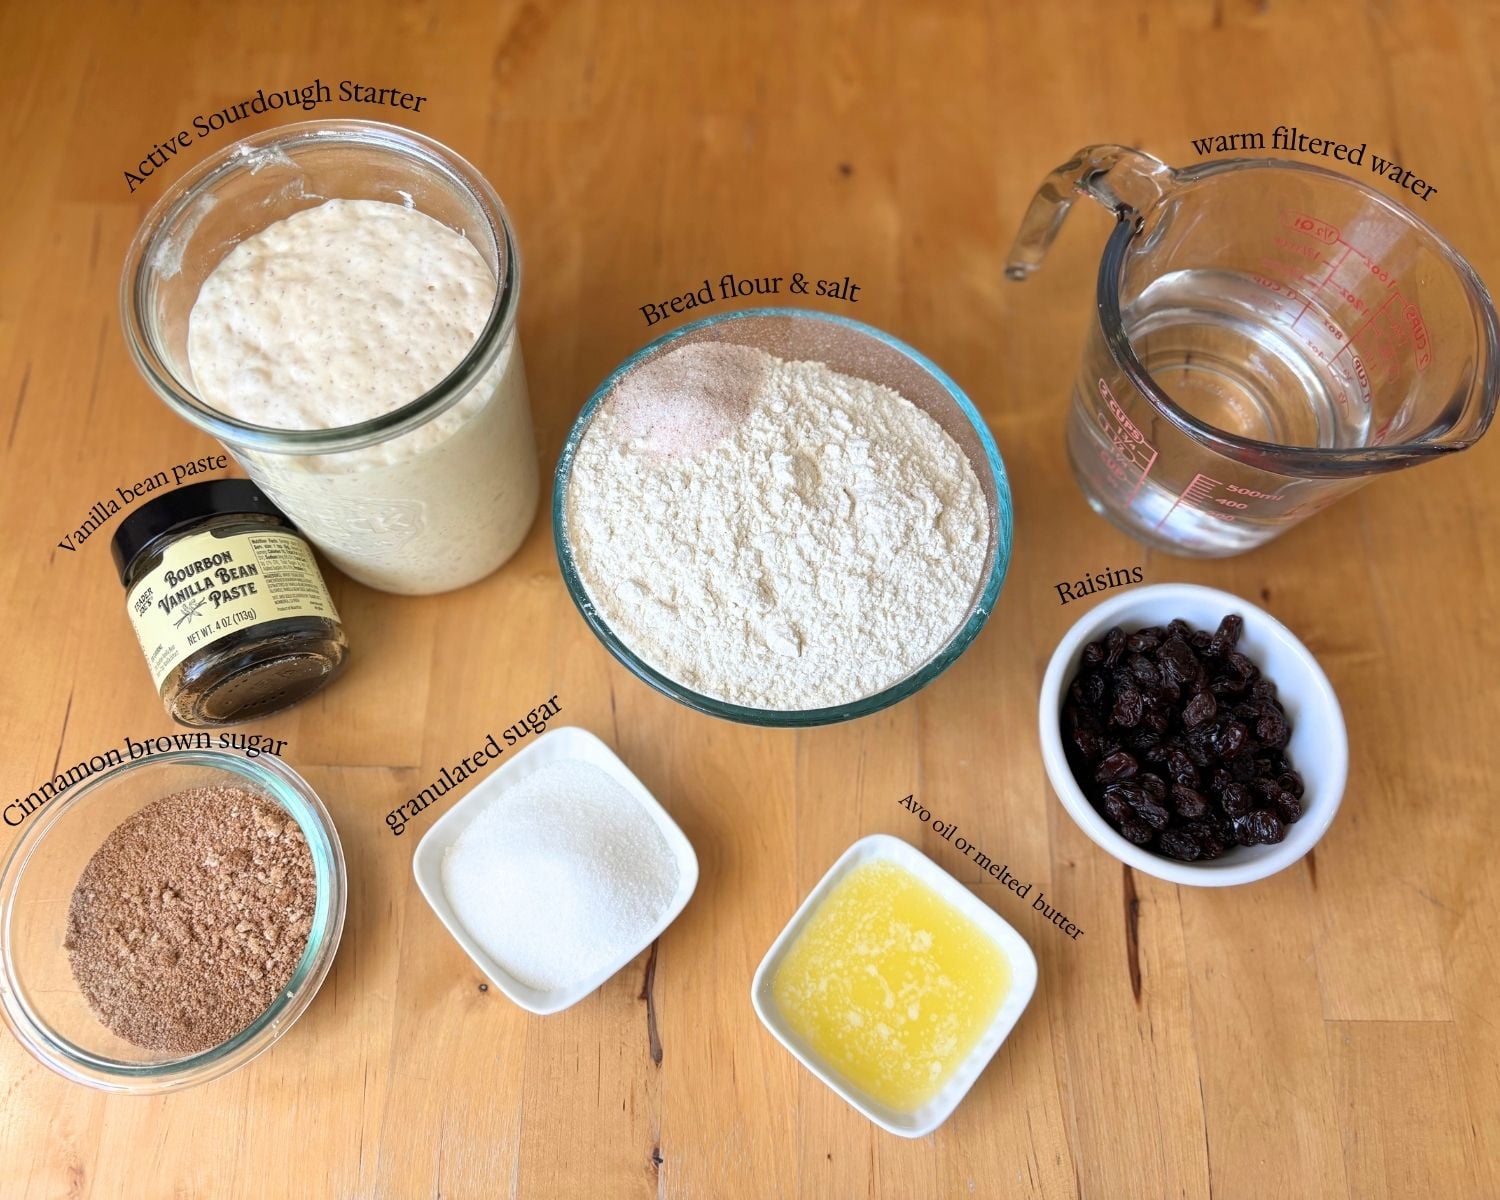
- 150 g active sourdough starter
- 280 g warm filtered water
- 25 g avocado oil
- 10 g vanilla bean paste or extract
- 50 g granulated sugar
- 500 g unbleached bread flour
- 10 g salt
Add-In
- 100 g raisins
Cinnamon Swirl Filling
- 50 g brown sugar
- 5 g ground cinnamon
- 10 g all-purpose flour
Instructions
1. Mix the Dough
In a large mixing bowl, combine the active sourdough starter, warm water, avocado oil, vanilla bean paste (or vanilla extract), and sugar. Stir until the mixture is smooth and milky.
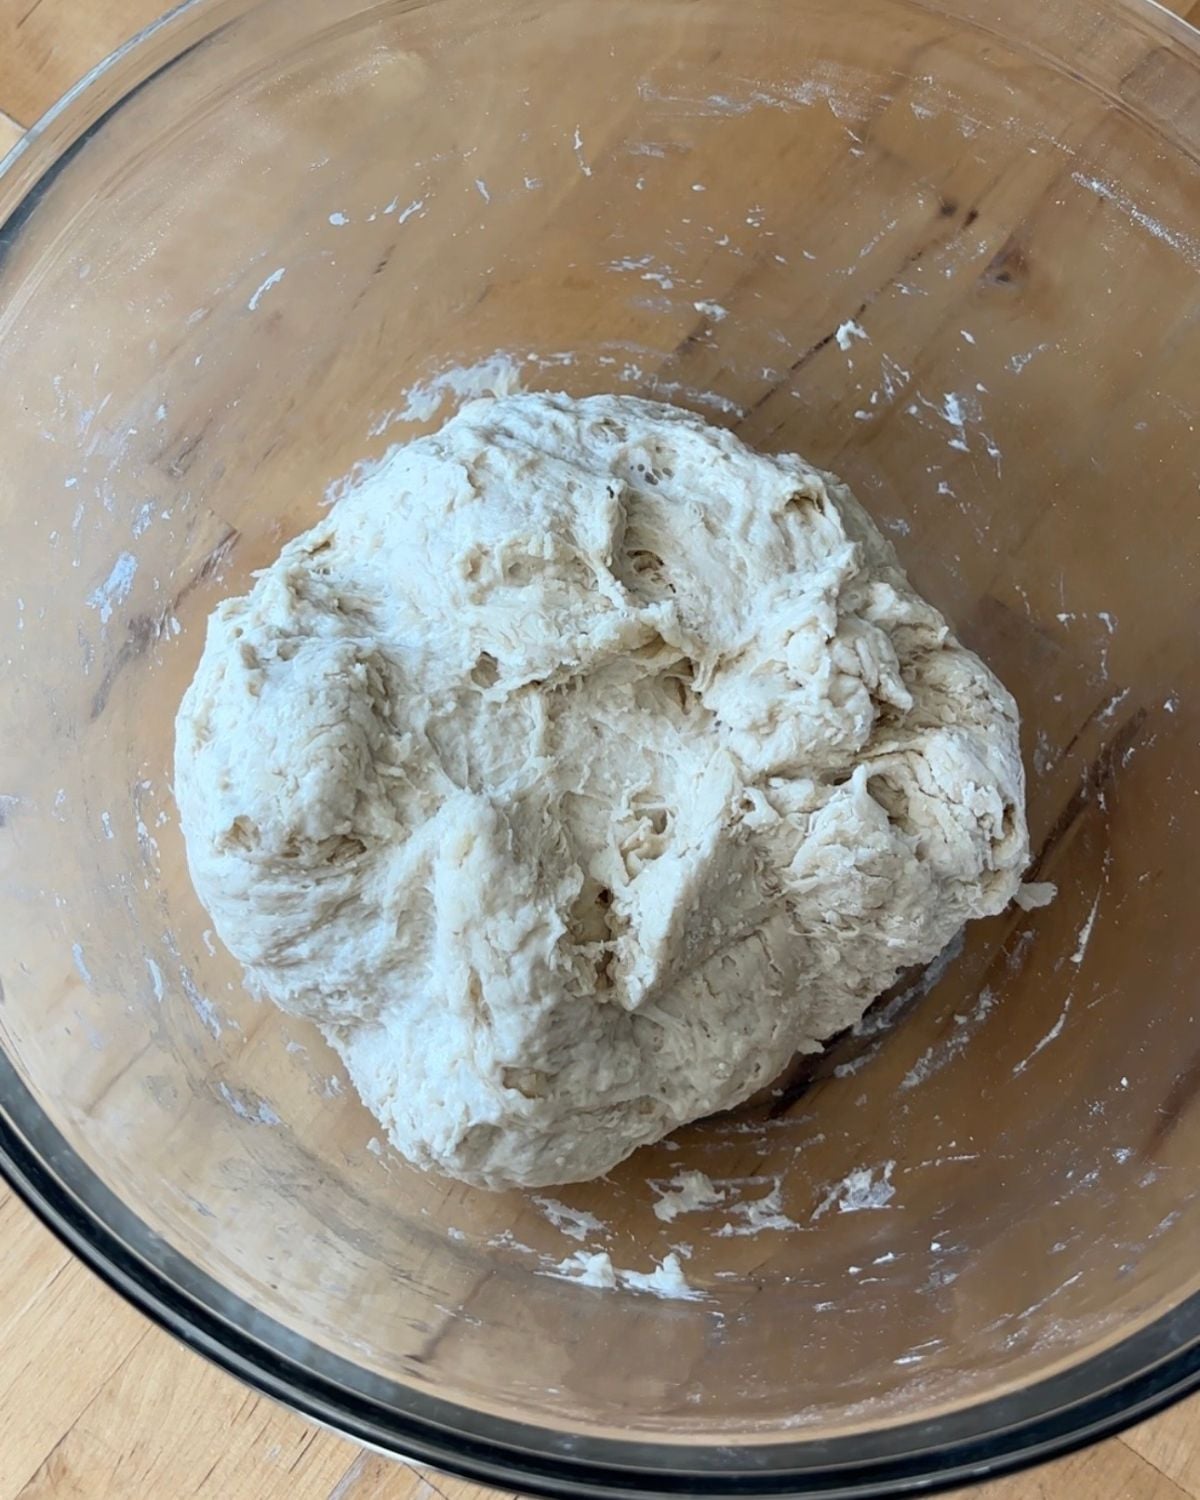
Add the bread flour and salt, then mix with a dough whisk until all of the flour is incorporated and a shaggy dough forms. It won’t be smooth at this point, that’s completely normal. Cover and let the dough rest for 1 hour.
Why isn’t the cinnamon mixed into the dough? Cinnamon has natural antimicrobial properties that can slow sourdough fermentation, so it’s added as a swirl instead of being mixed directly into the dough.
2. Soak the Raisins
While the dough rests, place the raisins in a bowl and cover them with hot water. Let them soak until you’re ready to add them during the second set of stretch and folds.
Soaking the raisins helps them become plump and soft before they’re added to the dough, so they won’t pull moisture from the dough during fermentation. This step is optional, but I highly recommend it!
3. Stretch and Folds
After the initial 1 hour rest, perform your first set of stretch and folds to build strength in the dough. We want to develop some structure before adding the raisins. Cover and let the dough rest for 30 minutes.
Drain the raisins and pat them dry. During the second set of stretch and folds, gently press a handful of raisins onto the surface of the dough. Stretch one side of the dough up and fold it over the raisins, then add another handful and repeat. Continue until you’ve worked your way around all four sides, tucking the raisins into the dough so none are left exposed. Cover and let the dough rest for another 30 minutes.
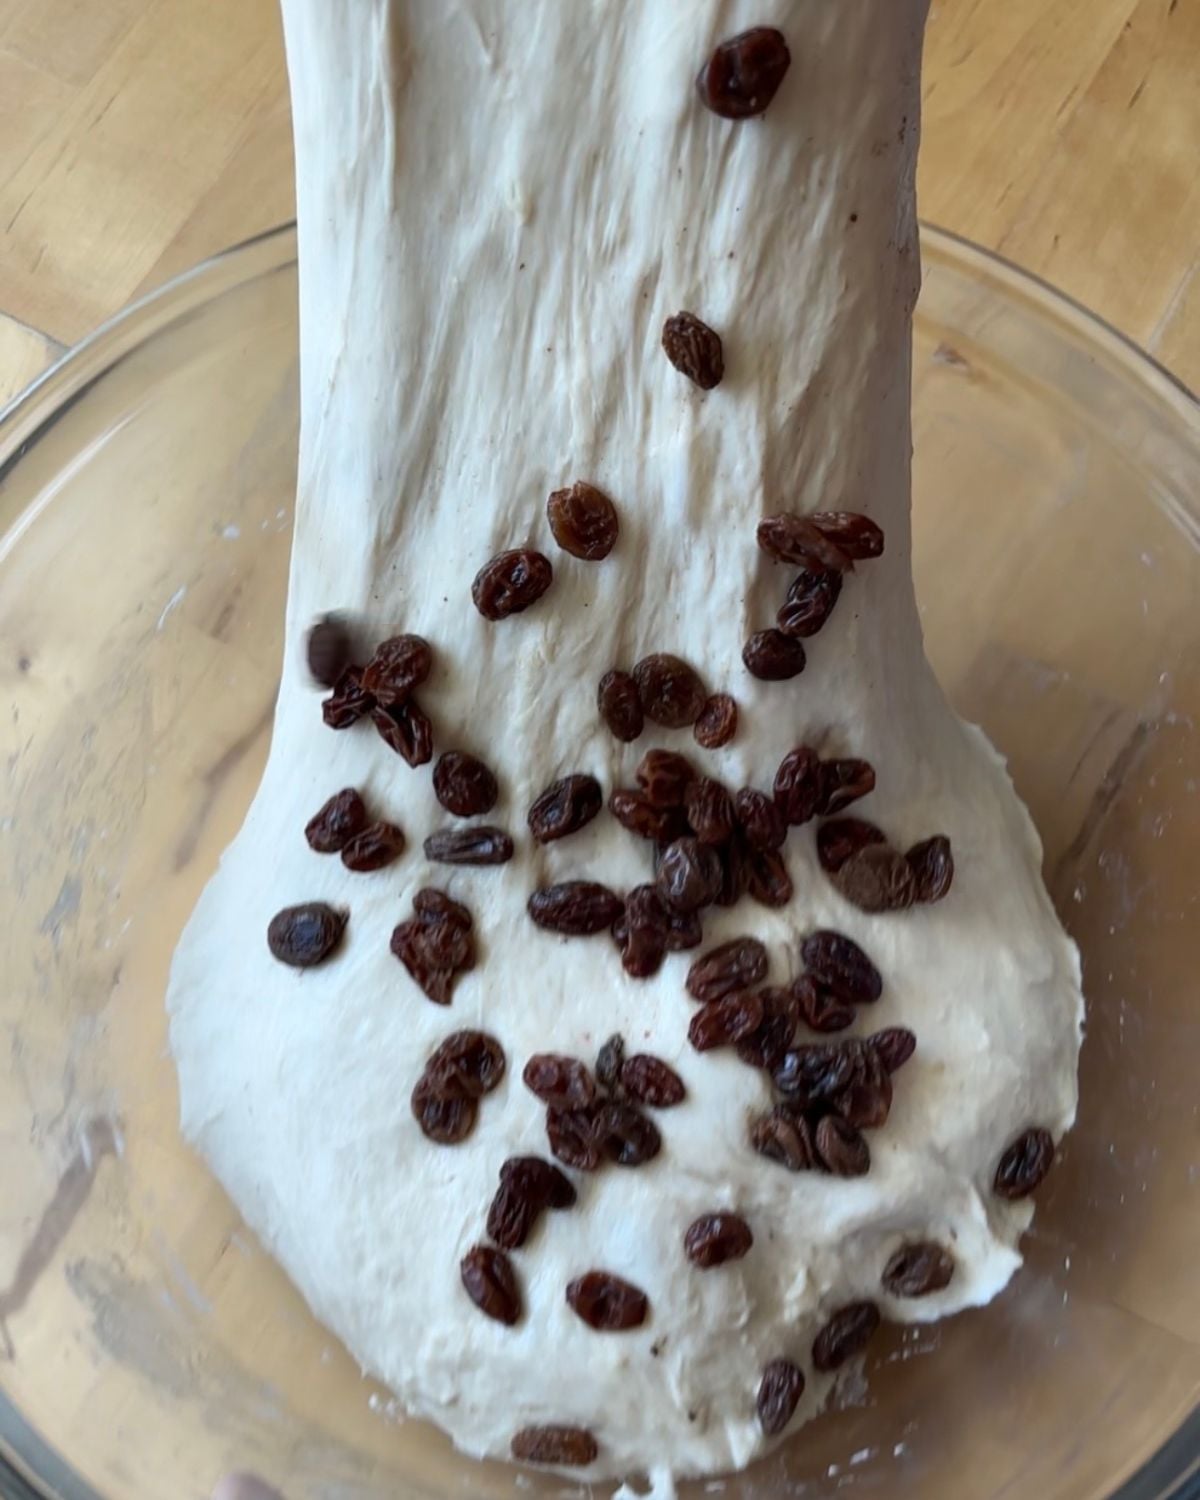
Perform a third set of stretch and folds, continuing to tuck any exposed raisins underneath the dough to help keep them contained.
Cover and continue bulk fermentation.
4. Bulk Fermentation
Cover the dough and allow it to bulk ferment until a little less than doubled in size, airy, bubbly, and jiggly.
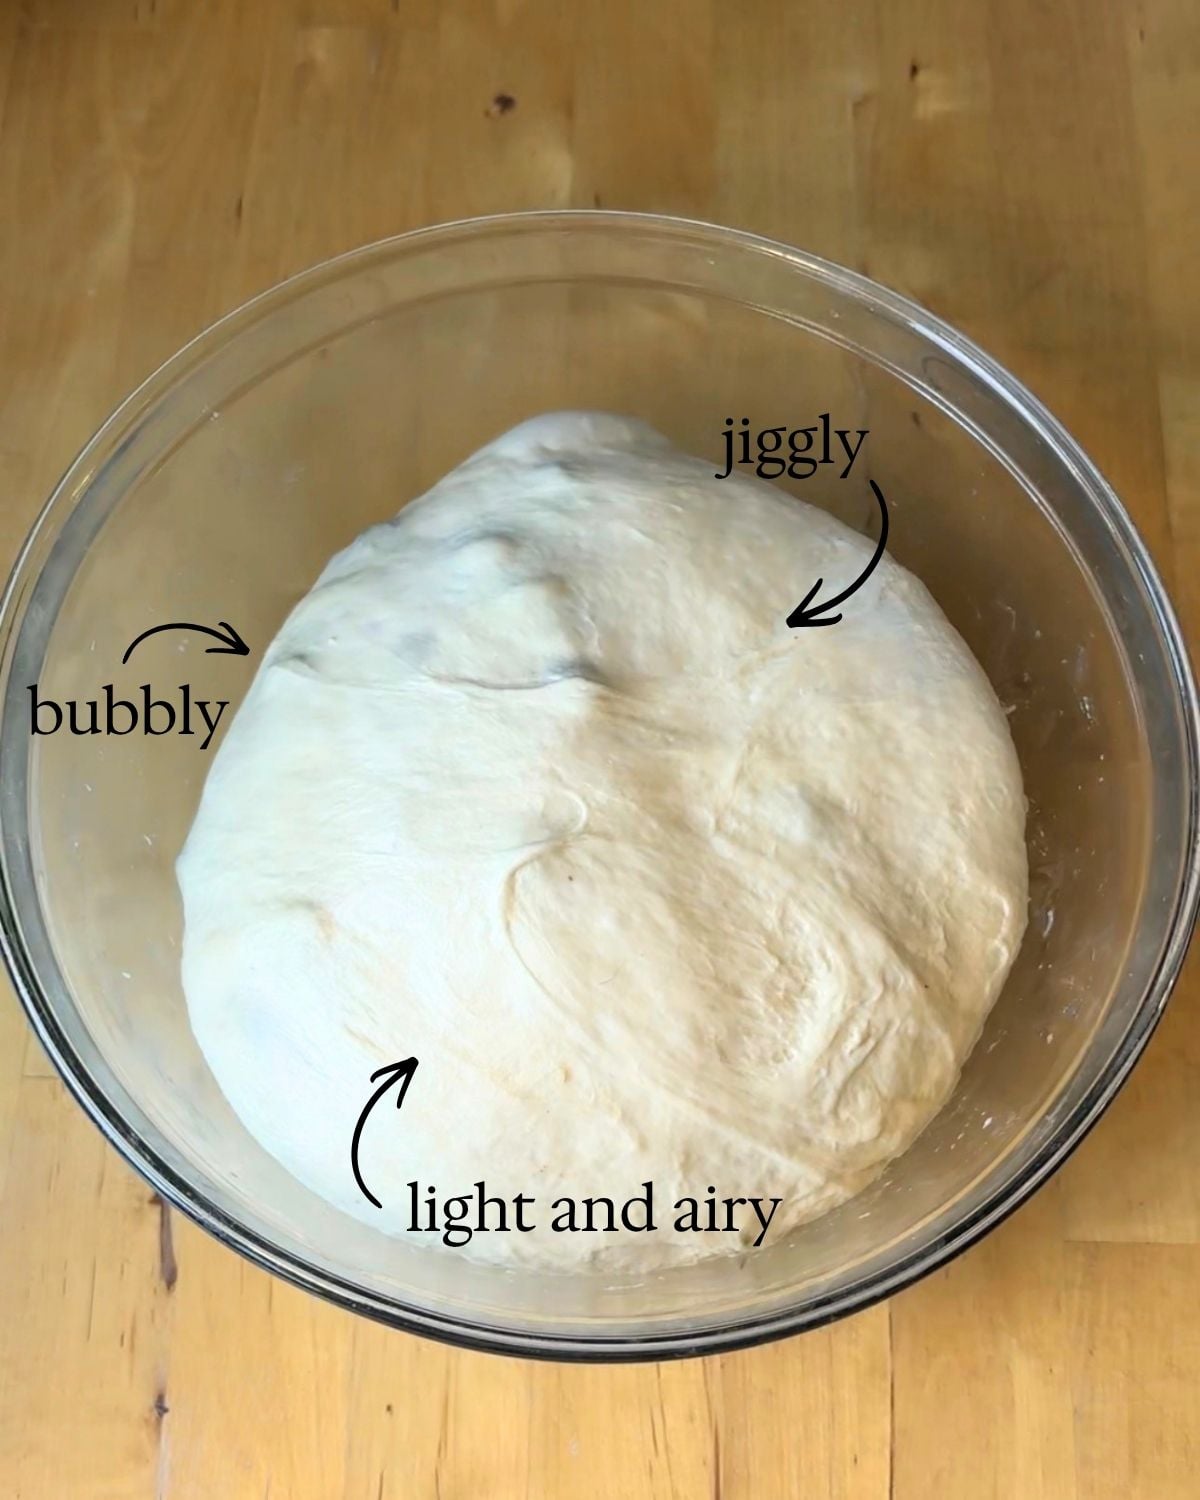
Use the dough temperature chart below as a guide but always watch the dough—not the clock. Time starts when you mixed your dough in step 1.
| Dough Temperature | Approximate Bulk Fermentation |
|---|---|
| 80°F (27°C) | 4–5 hours |
| 75°F (24°C) | 5–6 hours |
| 70°F (21°C) | 7–8 hours |
| 65°F (18°C) | 10–12 hours |
Tip: Be careful not to let your dough bulk ferment for too long. If it over ferments, it will become sticky and difficult to handle, making it much harder to roll a tight cinnamon sugar swirl.
5. Prepare the Filling
Mix together the brown sugar, cinnamon, and flour.
It may seem strange, but the flour is essential! Without it, the sugar can pull moisture from the dough and turn into a syrup, causing the filling to seep out of the swirl. The flour helps keep the filling in your dough, where it belongs!
6. Shape the Loaf
Grease a 10×5 inch loaf pan (or 13×4 loaf pan) with nonstick spray.
Turn the dough onto a lightly floured work surface.
Mist your hands and rolling pin with water to help prevent sticking.
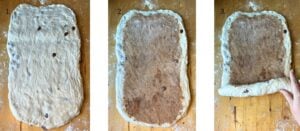
Gently stretch the dough into a long rectangle and using your rolling pin, roll it out approximately 9 x 18 inches.
If you notice any large air bubbles after rolling the dough into a rectangle, gently pop them before adding the filling. Make sure there are no visible tears in the dough for the cinnamon sugar mixture to leak through.
Lightly mist the dough with water (or brush on the thinnest film of water) before adding the filling.
Evenly sprinkle the cinnamon sugar mixture over the dough, leaving about 1 inch around both sides and the top. Leave the bottom edge uncovered only enough to begin rolling—the bottom of the rectangle will become the center of the swirl, so distribute the filling all the way down toward that edge. Use your hands to gently spread and pat the filling into an even layer over the dough.
Starting from the bottom, roll the dough tightly into a log. As you roll, gently pull the dough back toward yourself after each rotation before continuing to roll. This creates tension and keeps the swirl tight without trapping large air pockets.
As you roll, pinch the sides closed to keep the filling inside. Preventing the filling from leaking helps keep it from becoming syrupy during baking. Once you’ve finished rolling, pinch the seam along the bottom to seal it closed.
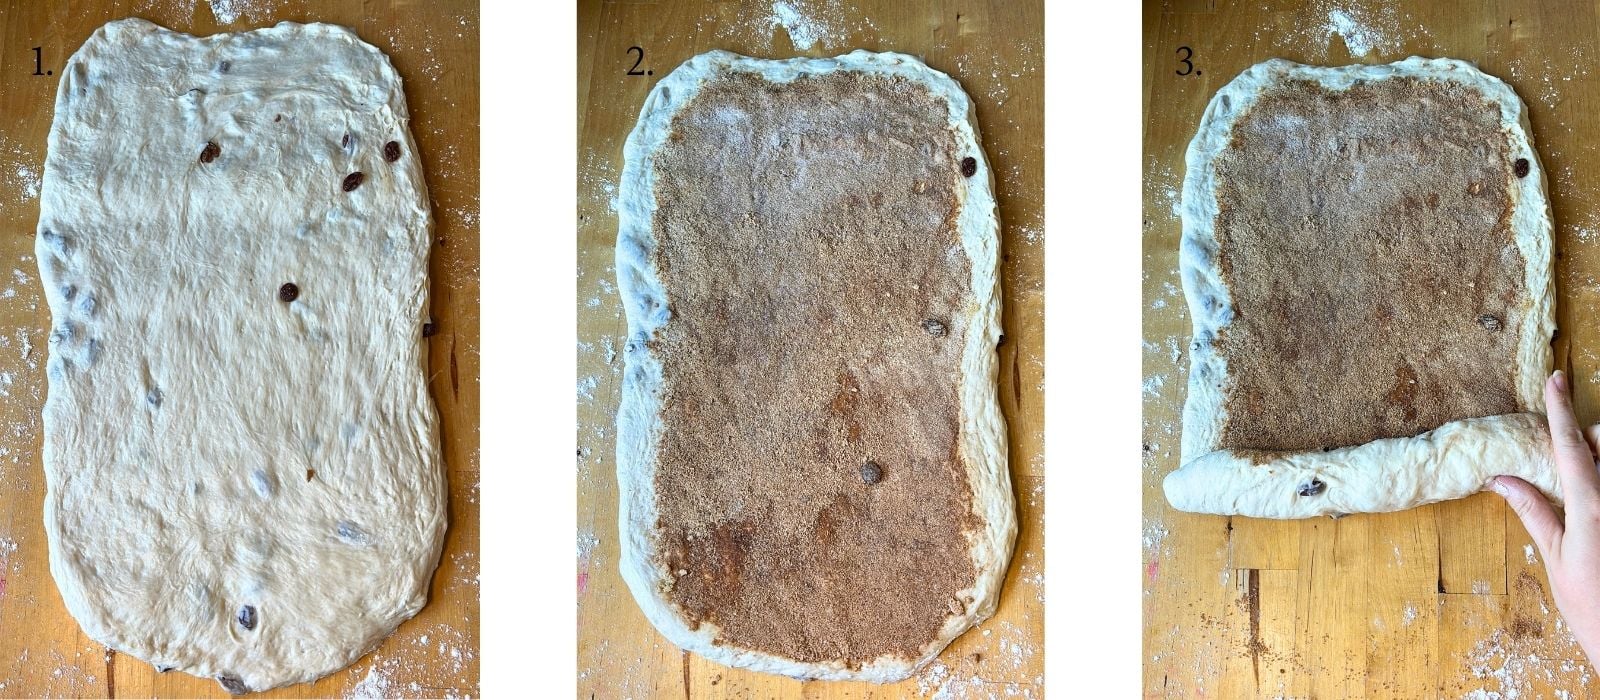
Place the loaf seam side down into a well greased 10 x 5 inch loaf pan (or 13×4 loaf pan).
7. Second Rise/Proof
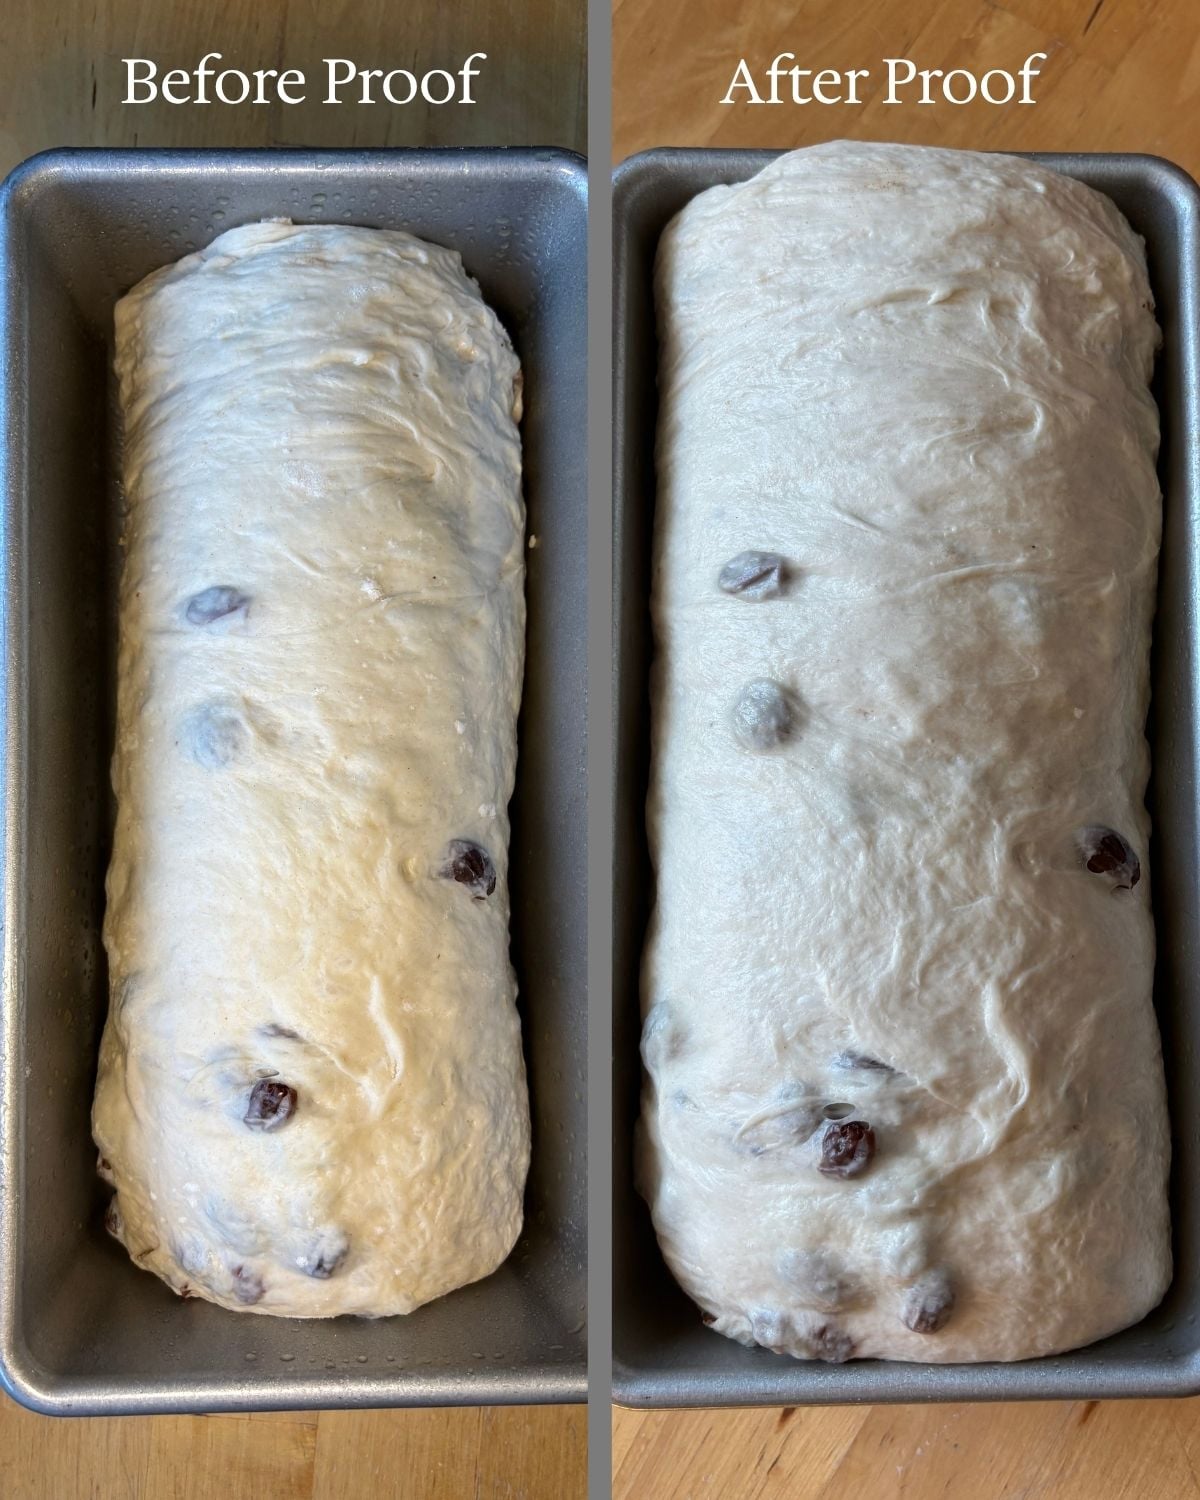
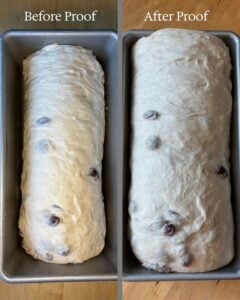
Same Day Method: Cover the dough and let it proof until it looks noticeably puffy and has risen to the top of the pan. Be careful not to let it rise over the top too much, over proofing can cause gaps in the cinnamon swirl.
Depending on your kitchen temperature, this second rise usually takes about 2 hours.
Overnight option: Cover dough and let it cold proof in the refrigerator overnight or up to 24 hours. Before baking, make sure it reaches the top of the pan as shown below. It may need to sit in a warm spot for a few hours to achieve this.
8. Bake
Preheat the oven to 375°F.
If you notice any large bubbles on the surface of the dough, gently pop them with a toothpick or a bread lame blade.
Bake uncovered for 35 minutes, then loosely tent the loaf with a piece of aluminum foil and continue baking for 10 more minutes.
The bread is done when the crust is golden brown and the center reaches an internal temperature of 200°F. I use this thermometer to check the internal temperature.
9. Cool
As soon as the bread comes out of the oven, brush the top with melted butter for an extra soft crust.
Remove the bread from the pan and transfer it to a cooling rack.
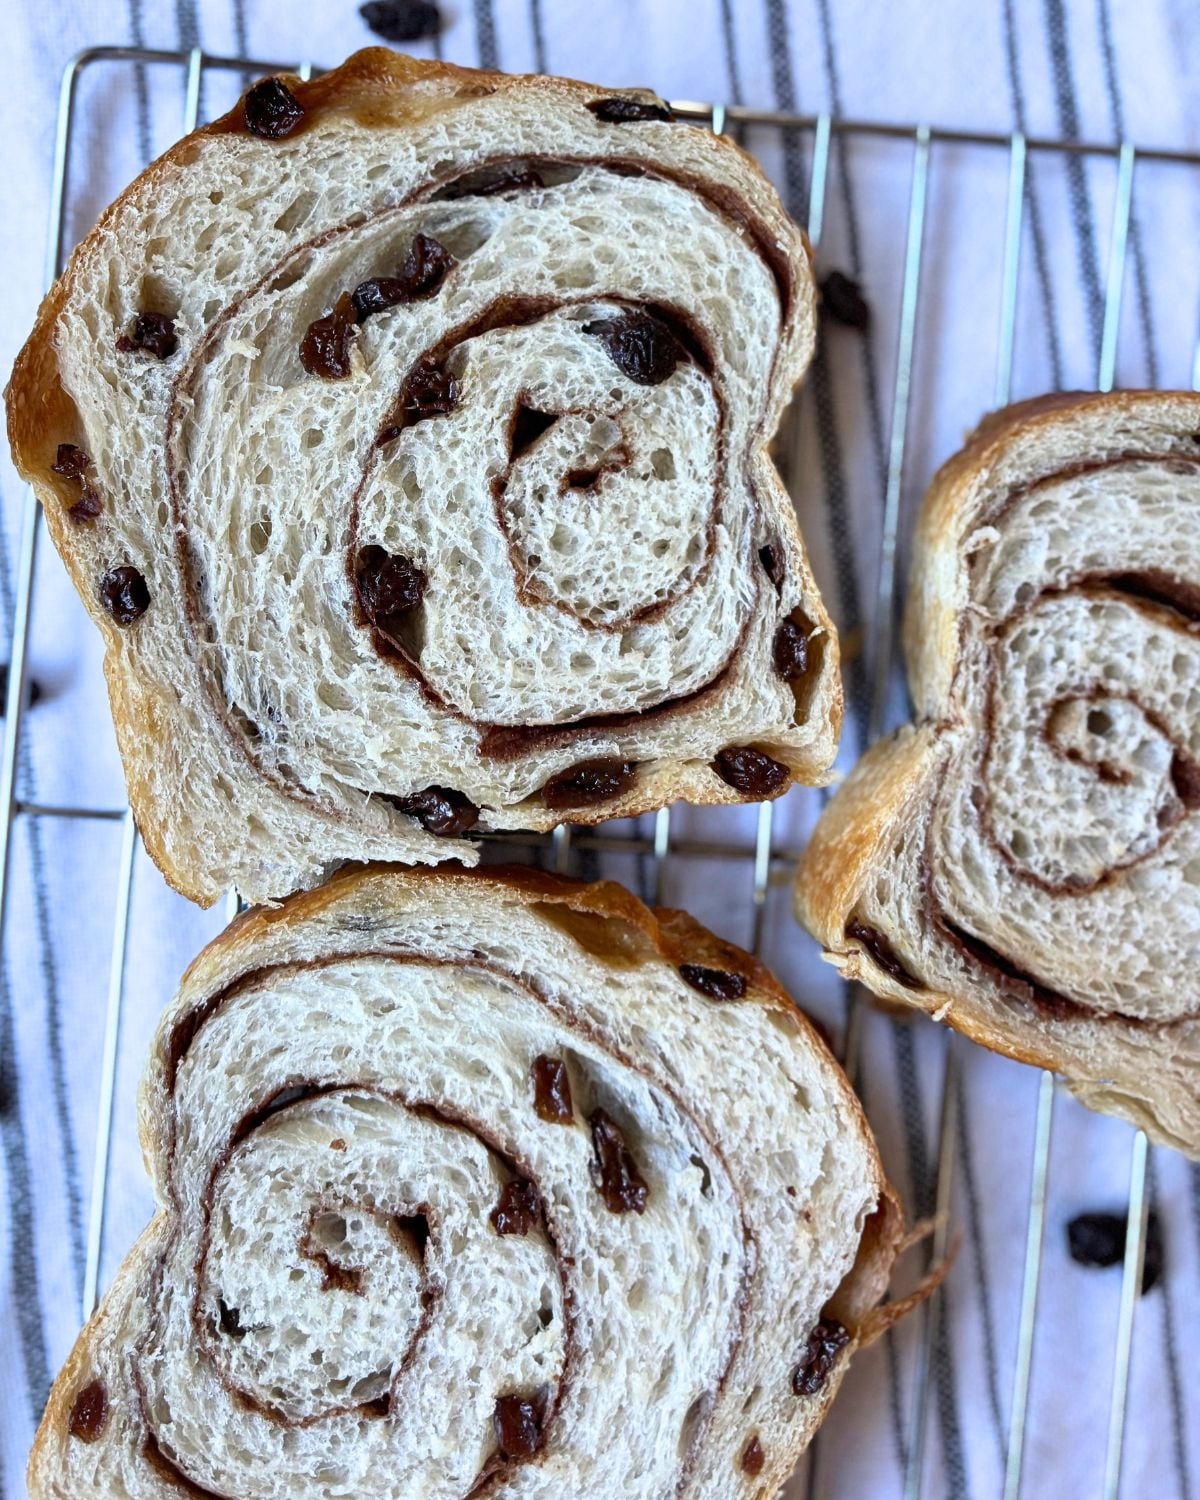
Allow the bread to cool completely before slicing for the cleanest swirl and best texture.
Tips to Prevent Gaps in Your Cinnamon Swirl
If you’ve ever sliced into your loaf only to find a large gap in the cinnamon swirl, you’re not alone! This is one of the most common challenges when making cinnamon swirl bread. Here are my best tips for creating a tight, beautiful swirl every time.
1. Pop Large Air Bubbles: After stretching your dough into a rectangle, check for any large air bubbles and gently pop them before adding the cinnamon sugar filling. Trapped air can expand during baking and create gaps in the swirl.
2. Leave a Border Around the Edges: Leave about a 1-inch border around the sides and top of the dough without filling. This allows the dough to seal to itself instead of sealing to the cinnamon sugar, helping keep the swirl intact.
3. Roll the Dough Tightly: Starting at the bottom edge, roll the dough into a tight log. After each turn, gently pull the dough back toward yourself before continuing to roll. This creates tension and helps eliminate gaps between the layers.
4. Pinch the Seams Closed: Once the loaf is rolled, pinch the seam and both ends closed. If the filling leaks out during proofing or baking, it can melt into a syrup and prevent the layers from sticking together properly.
5. Add a little flour to the filling. Mixing a small amount of flour into the cinnamon sugar helps absorb moisture as the bread bakes, reducing gummy layers and helping the swirl stay intact.
Storage
To keep my sourdough fresh, I store it in these sandwich bags from Amazon, which come with twist ties and mimic store bought storage methods. I usually keep the loaf on the counter for up to 2 days, then slice and freeze any leftovers. Sourdough freezes really well, just thaw or toast slices as needed.

1. Same Day Baking Timeline
9:00 PM: Feed starter (1:5:5)
8:00 AM: Mix dough
9:00–10:30 AM: 3 sets of stretch and folds (every 30 minutes)
10:30 AM–2:30 PM: Bulk ferment
2:30 PM: Shape and place in loaf pan
2:30–4:30 PM: Final proof
4:30–5:15 PM: Bake
5:15 PM+: Cool completely before slicing
2. Overnight Cold Proof Timeline
9:00 PM: Feed starter (1:5:5)
8:00 AM: Mix dough
9:00–10:30 AM: 3 sets of stretch and folds (every 30 minutes)
10:30 AM–2:30 PM: Bulk ferment
2:30 PM: Shape and place in loaf pan
2:40 PM: Cover and refrigerate overnight (12–24 hours)
Next Morning 8 AM: Remove from the refrigerator and let the dough finish proofing until it has risen to the top of the pan. This can take anywhere from 1–4 hours, depending on your kitchen temperature and how much the dough rose overnight.
10:00-10:45 AM: Bake
10:45 AM+: Cool
Soft Sourdough Cinnamon Raisin Swirl Bread
Equipment
- 1 Large mixing bowl
- 1 small bowl (for soaking raisins)
- 1 small bowl (for cinnamon sugar mixture)
- 1 sheet of foil
- 1 Cooling rack
Ingredients
Feeding Starter 1:5:5 Ratio
- 15 g sourdough starter
- 75 g unbleached Flour
- 75 g filtered water
Dough
- 150 g active sourdough starter
- 280 g warm filtered water
- 25 g avocado oil sub: olive oil or melted butter
- 10 g vanilla bean paste or extract
- 50 g granulated sugar
- 500 g unbleached bread flour
- 10 g salt
Add-In
- 100 g raisins
- hot water to cover raisins
Cinnamon Swirl Filling
- 50 g brown sugar 1/4 cup
- 5 g ground cinnamon 2 tsp
- 10 g unbleached bread flour 1 tbsp + 1 tsp
Optional Topping
- 1 tbsp melted butter
Instructions
Feeding Sourdough Starter (Before Bed)
- This is a same day recipe, but I usually feed my starter the night before. I've included this step below for anyone who wants a little extra guidance.The night before making the dough feed your starter a 1:5:5 ratio. 15g starter75g unbleached flour75g filtered waterThe recipe calls for 150g of active starter, this ratio will leave you with 15g extra to keep your starter going.15 g sourdough starter, 75 g unbleached Flour, 75 g filtered water
Mix the Dough (In the morning)
- In a large mixing bowl, combine the active sourdough starter, warm water, avocado oil, vanilla bean paste (or vanilla extract), and sugar. Stir until the mixture is smooth and milky150 g active sourdough starter, 280 g warm filtered water, 25 g avocado oil, 10 g vanilla bean paste, 50 g granulated sugar
- Add the bread flour and salt, then mix with a dough whisk until all of the flour is incorporated and a shaggy dough forms. It won’t be smooth at this point, that’s completely normal. Cover and let the dough rest for 1 hour.500 g unbleached bread flour, 10 g salt
Soak the Raisins
- While the dough rests, place the raisins in a bowl and cover them with hot water. Let them soak until you’re ready to add them during the second set of stretch and folds.100 g raisins, hot water to cover raisins
Stretch and Folds
- After the initial 1 hour rest, perform your first set of stretch and folds to build strength in the dough. We want to develop some structure before adding the raisins. Gently stretch a side of the dough upward, then fold it over the center, rotating the bowl until you've folded all four sides. Cover and let the dough rest for 30 minutes.
- Drain the raisins and pat them dry. During the second set of stretch and folds, gently press a handful of raisins onto the surface of the dough. Stretch one side of the dough up and fold it over the raisins, then add another handful and repeat. Continue until you’ve worked your way around all four sides, tucking the raisins into the dough so none are left exposed. Cover and let the dough rest for another 30 minutes.
- Perform a third set of stretch and folds, continuing to tuck any exposed raisins underneath the dough to help keep them contained.Cover and continue bulk fermentation.
Bulk Fermentation
- Cover the dough and allow it to bulk ferment until a little less than doubled in size, airy, bubbly, and jiggly. Use the dough temperature chart below as a guide but always watch the dough, not the clock. Time starts when you mixed your dough in step 1.Dough Temperature vs. Approx Bulk Fermentation Time80°F (27°C) 4–5 hours75°F (24°C) 5–6 hours70°F (21°C) 7–8 hours65°F (18°C) 10–12 hoursTip: Be careful not to let your dough bulk ferment for too long. If it over ferments, it will become sticky and difficult to handle, making it much harder to roll a tight cinnamon sugar swirl.
Prepare the Filling
- Mix together the brown sugar, ground cinnamon, and flour.50 g brown sugar, 5 g ground cinnamon, 10 g unbleached bread flour
Shape the Loaf
- Grease a 10×5 inch loaf pan (a 13×4 will also work here) with nonstick spray.Turn the dough onto a lightly floured work surface.Mist your hands and rolling pin with water to help prevent sticking. Gently stretch the dough into a long rectangle, then use a rolling pin to roll it to approximately 9 × 18 inches.If you notice any large air bubbles after rolling the dough into a rectangle, gently pop them before adding the filling. Make sure there are no visible tears in the dough for the cinnamon sugar mixture to leak through.
- Lightly mist the dough with water (or brush on the thinnest film of water) before adding the filling.Evenly sprinkle the cinnamon sugar mixture over the dough, leaving about 1 inch around both sides and the top. Leave the bottom edge uncovered only enough to begin rolling—the bottom of the rectangle will become the center of the swirl, so distribute the filling all the way down toward that edge. Use your hands to gently spread and pat the filling into an even layer over the dough.
- Starting from the bottom, roll the dough tightly into a log. As you roll, gently pull the dough back toward yourself after each rotation before continuing to roll. This creates tension and keeps the swirl tight without trapping large air pockets.As you roll, pinch the sides closed to keep the filling inside. Once you've finished rolling, pinch the seam along the bottom to seal it closed.

- Place the loaf seam-side down into a well greased 10 x 5 inch (or 13x4in) loaf pan.
Second Rise
- Same Day Method (recommended): Cover the dough and let it proof until it looks noticeably puffy and has risen to the top of the pan. Be careful not to let it rise over the top, as over proofing can cause gaps in the cinnamon swirl.Depending on your kitchen temperature, this second rise usually takes about 2 hours. A warmer kitchen will speed up the rise, while a cooler kitchen will slow it down.Overnight option: Cover dough and let it cold proof in the refrigerator overnight or up to 24 hours. Before baking, make sure it reaches the top of the pan. You may have to let it sit in a warm spot for 1-4 hours depending on how much it rose in the refrigerator.

Bake
- Preheat the oven to 375°F.Pop any large bubbles on the surface of the dough with a toothpick. Bake uncovered for 35 minutes, then loosely tent the loaf with a piece of aluminum foil and continue baking for 10 more minutes. The bread is done when the crust is golden brown and the center reaches an internal temperature of 200°F.
Cool
- As soon as the bread comes out of the oven, brush the top with melted butter for an extra soft crust. (I just use a stick of butter and rub it on the crust, less dishes!)Remove the bread from the pan and transfer it to a cooling rack. Let it cool completely before slicing to prevent a gummy crumb.Enjoy!
Video
Nutrition
Frequently Asked Questions
- Can I bake this in a 9×5-inch loaf pan? For best results, I recommend baking this bread in a longer loaf pan, such as a 10×5-inch or 13×4-inch pan. This recipe was developed with those sizes in mind and gives the loaf plenty of room to expand. That said, a 9×5-inch loaf pan can still work! Instead of rolling the dough into a 9 × 18-inch rectangle, roll it to approximately 8 × 20 inches. This creates a narrower log that fits the smaller pan better while still giving you a beautiful cinnamon swirl.
- Can I skip soaking the raisins? Yes, but I don’t recommend it. Soaking the raisins first lets them absorb water before they’re added to the dough, keeping them plump and tender instead of pulling moisture from the dough during fermentation.
- Can I freeze this bread? Yes! Slice the cooled loaf before freezing so you can easily toast individual slices.
- Is this bread sweet? It has the perfect balance of sweetness and a bit of tang from the sourdough. It’s delicious with butter, toasted, or used for French toast.
- Why isn’t the cinnamon mixed into the dough? Cinnamon has natural antimicrobial properties that can slow sourdough fermentation, so it’s added as a swirl instead of being mixed directly into the dough.


Leave a Reply